- Home
-

- Multilogin 6 (legacy)
-
- How to use Multilogin 6
-
- IP masking & proxy solutions
-
- How to use proxy over SSH (POSSH) in Multilogin 6
How to use proxy over SSH (POSSH) in Multilogin 6
 Written by
( Updated on March 11th, 2026 )
Written by
( Updated on March 11th, 2026 )
Updated on March 11th, 2026
⚠️ Still using Legacy Multilogin 6? You are missing the good stuff!
The new Multilogin lets you run browser profiles and Android cloud phones in one workspace – manage desktop and mobile accounts without extra tools or devices.
⚡ Want to join the migration queue? Download the latest Multilogin 6 version (scroll to the bottom of the page), open it and click “Migrate”.
- 🖥️ Better workspace: Web interface • Desktop app • Dark mode • 2FA
- 🧑💻 Mobile + browser accounts together: Android cloud phones • Mimic and Stealthfox browsers
- 🌐 Faster setup: Profile and proxy templates • Extension manager
- 💾 Flexible profile storage: Local profiles • Cloud profiles • Storage converter
- ⚡ Productivity tools: Profile folders & tags • Column manager • Running profiles manager • Trash bin • Copy profile ID
- 🤖 Automation ready: API access in all plans • Selenium / Puppeteer / Playwright support • CLI tool • Script runner
👉 Curious what else changed? Read New Multilogin version: how is it different from Multilogin 6.
Want to keep your browsing even more private and secure? POSSH (Proxy Over SSH) lets you encrypt your traffic and route it through an SSH server – no extra proxy setup needed!
The biggest advantage of using an SSH tunnel over a conventional HTTP or Socks proxy is that it can be easily set up without any extra proxy-related installations on the server. Additionally, SSH tunnels encrypt your traffic, enhancing data security.
Explore our Pixelscan + Multilogin integration guide to learn how pairing the leading fingerprint testing tool with Multilogin’s advanced antidetect features creates the ultimate setup for staying invisible online.
How to use POSSH
Before you start, make sure you have the following details (if you don’t, ask your proxy provider):
- SSH server IP (or host) and port
- SSH server credentials, such as your username and password
Once you have all these details, you are ready to set up a Multilogin profile.
- Go to the "Plugins" section
- Activate the POSSH proxy plugin
- Click "Create new" and go to the "Proxy" tab
- Select "POSSH" in "Connection type"
- Fill out the "IP or host", "Port", "Username" and "Password" fields
Paste the proxy details into the "IP or host" field in the format IP:port:username:password or host:port:username:password and other fields will be populated automatically.
- Click "Check proxy"
- "Connection test passed" means that Multilogin was able to connect to the proxy successfully and get the required IP-dependent data
- "Connection test failed" means that Multilogin couldn't connect to the proxy
- Click "Create profile" → "Start"
To use the POSSH plugin on Windows Server operating systems, you need to enable the "Developer Mode" in Windows settings and restart the system.
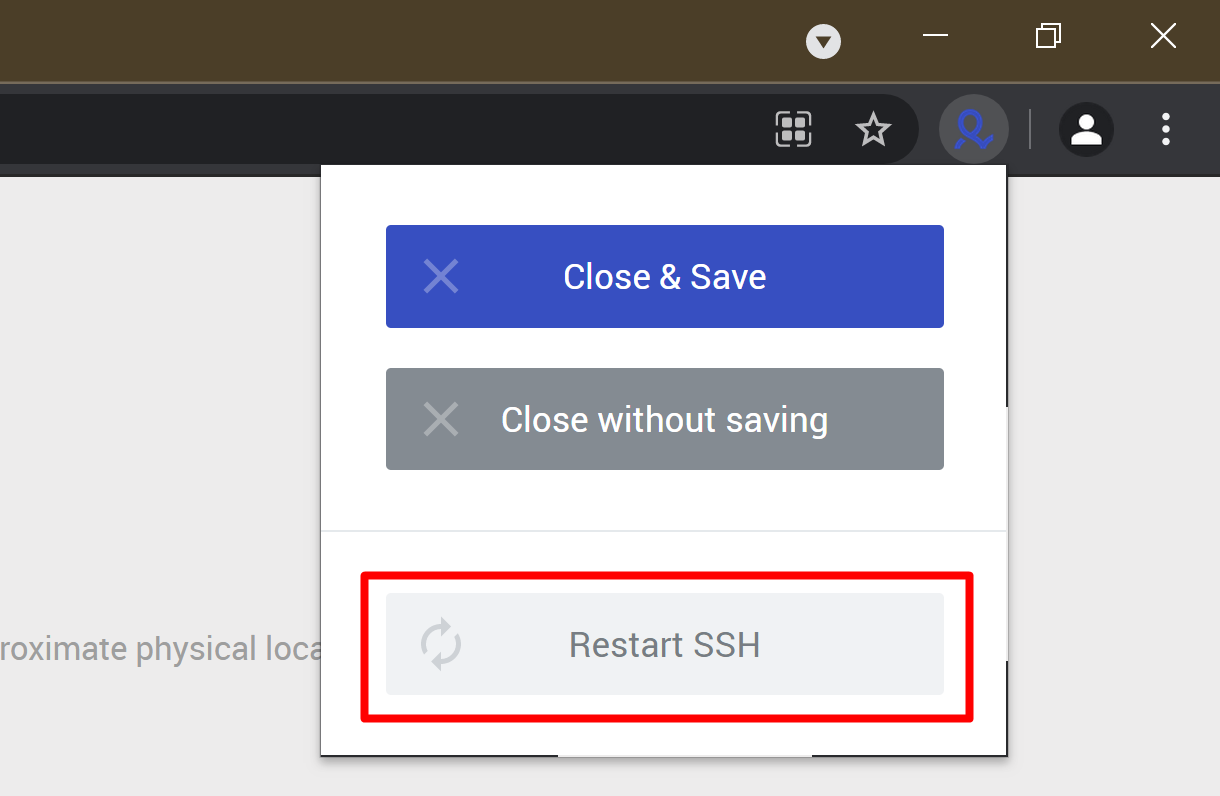
How to restart the SSH tunnel
Due to the nature of SSH tunnels, they can sometimes drop mid-session. In this case, you can try the solution below:
- Click the Multilogin icon in the top right corner of the profile window (to find it, you may need to click on the puzzle icon first)
- Click "Restart SSH"