How to test a proxy in Multilogin
Most profile issues, according to our users, are caused by a malfunctioning proxy. But how can you tell if the problem is with Multilogin or your proxy?

The answer: check your proxy connection.
Testing your proxy outside the app helps determine the root cause of the issue:
- If the proxy works outside Multilogin X, the issue is likely with the app
- If the proxy doesn’t work anywhere, the issue is with the proxy itself
In this article, we’ll guide you through three simple options to test your proxy and pinpoint the issue. You will learn how to test the proxy both in Multilogin and outside the app.
If your system time is set manually, it can cause connection issues. In this case, sync your timezone with the internet to fix the issue. This simple step often restores normal functionality!
Option 1: check proxy with Multilogin
Check proxy
Check proxy traffic
Multilogin proxy
First, check the proxy traffic in the bottom-left corner of the app.

Then, top up your Multilogin proxy, if the traffic has run out.
Top up proxy
Proxy traffic is available at a fixed rate of €3 per GB. To top up, check out the guide on adding proxy traffic in Multilogin.
VAT may be applied to proxy packages depending on your location and tax status.
Custom proxy
Contact your proxy provider to check the current amount of traffic and top it up if necessary.
Check proxy connection status
If your proxy has enough traffic, test if it's online:
Multilogin X
Select a profile from the list and click “Check proxy” in the top menu. If you use Multilogin proxy, you can also click “Refresh IP” to get a new IP from the same pool.

These options are also available in the right-click menu.

Multilogin 6
- Go to your profile settings
- Click “Proxy” in the left menu
- Click “Check proxy”

Here’s what the results mean:
- Proxy check passed: Multilogin connected to your proxy and got everything it needs
- Proxy check failed: the root cause found, your proxy is offline – replace it to continue working in this profile or get a new IP
Option 2: check proxy with browser extensions
Want another way to check if your proxy is working? Use a browser extension to test it in a regular Firefox and Chrome browser:
- If the proxy doesn’t work in a regular browser (you can’t load any pages), contact your proxy provider for help
- If the proxy works in a regular browser but not in Multilogin, let our support team know so we can investigate!
If your proxy doesn’t work in a regular Chrome or Firefox browser, it won’t work in Multilogin either.
No worries, though – your proxy provider can help! They might:
- Fix a server-side issue
- Provide you with a new proxy
- Adjust some settings to get things running
Reach out to them, and they’ll sort it out for you!
Option 3: check proxy with local settings
Finally, you can check your proxy by adding it to your device’s network settings. Then, try loading a website in your browser.
Here’s what to do next:
- If the proxy doesn’t work (you can’t load any pages), contact your proxy provider for help
- If the proxy works fine on your device but not in Multilogin, reach out to our support team – we’ve got your back!
Windows
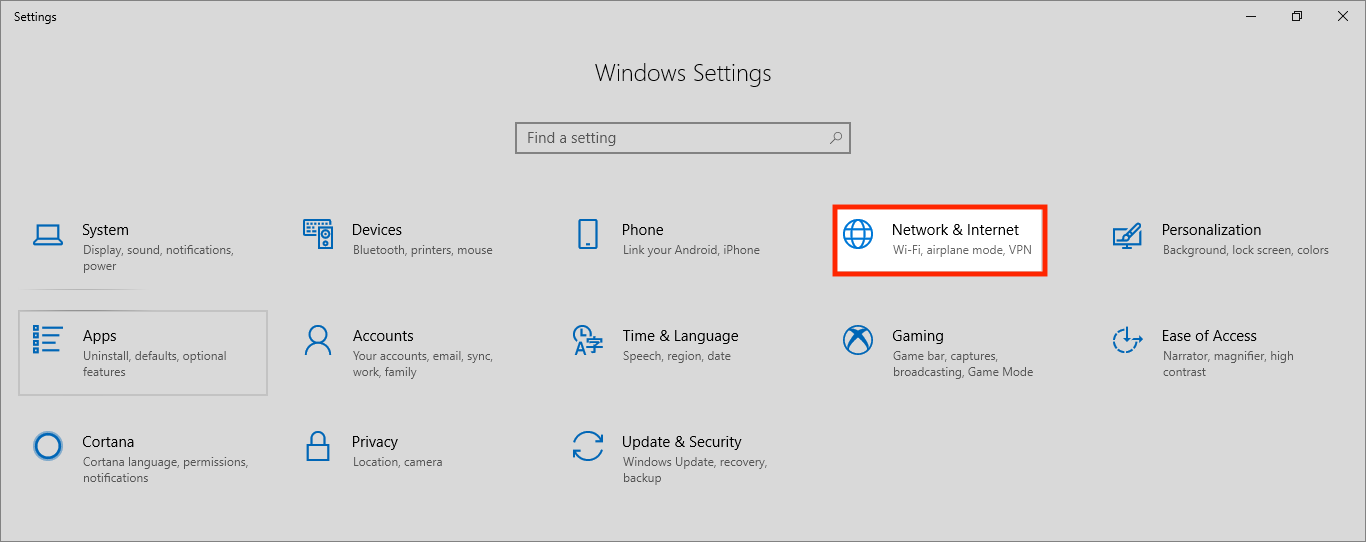
- Open the start menu in the bottom left corner and click the gear icon
- In the “Windows Settings” menu, go to “Network & Internet”

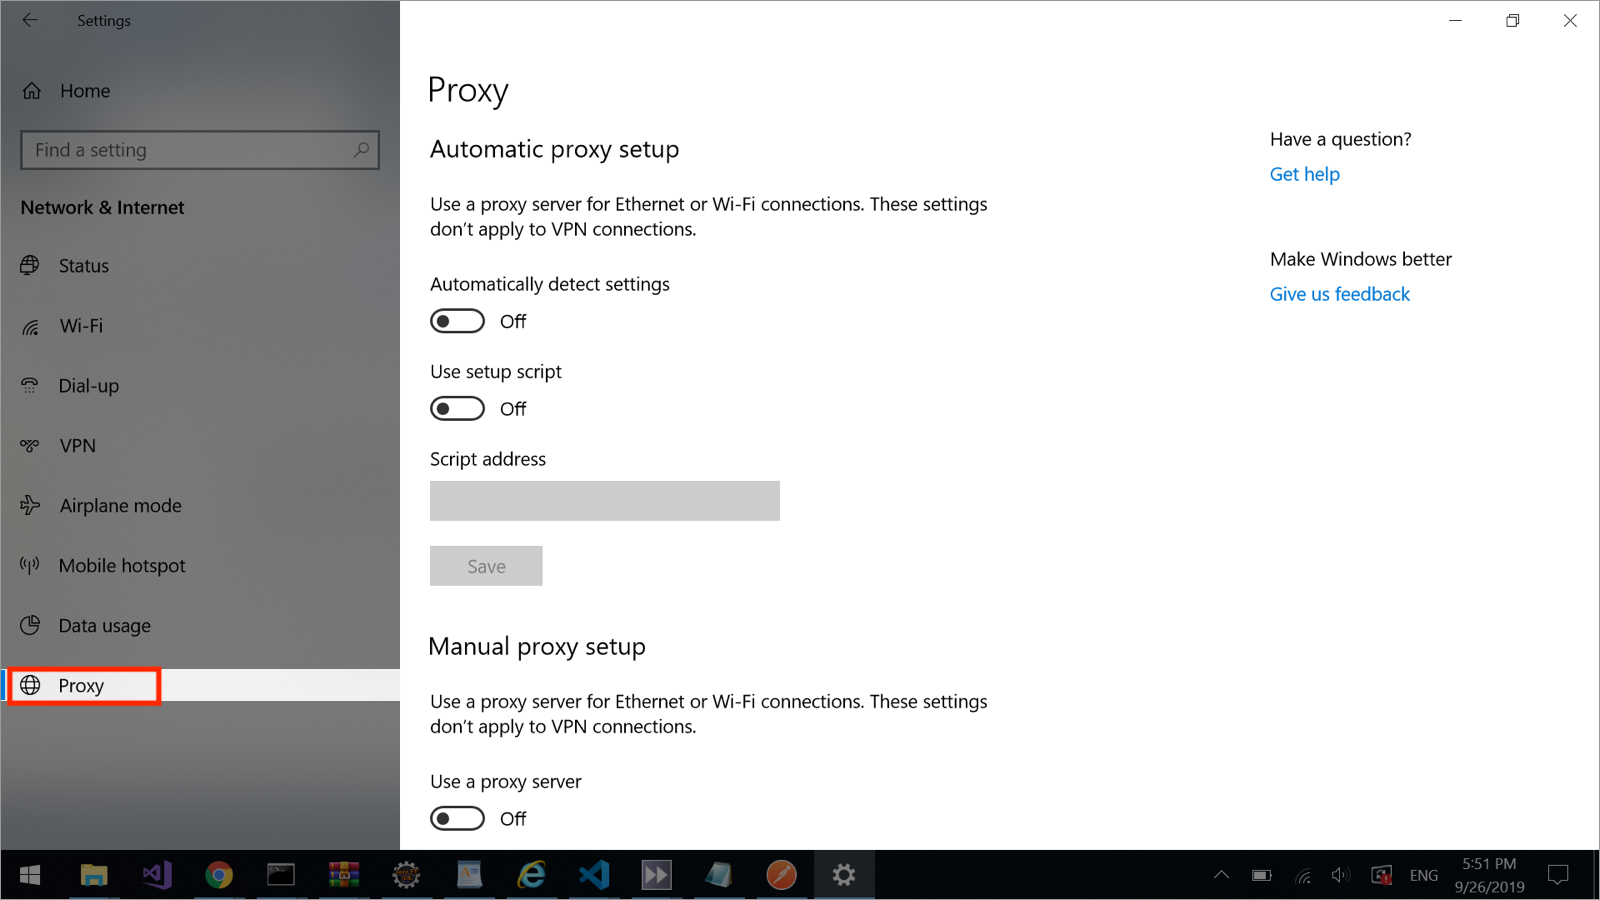
- Click “Proxy” in the left panel to access proxy settings

- Set up a proxy:
- Automation setup: enable the “Use setup script” option – you'll get the PAC file path in the “Script address” section.
-
Manual setup:
- Under “Manual proxy setup” enable the “Use a proxy server” option
- Enter your proxy details into the “Address” and “Port” sections
- Enable “Don’t use the proxy server for local (intranet) addresses”
Ensure the PAC file is saved on your computer, and there’s a complete path to it.
macOS
- Open your system settings and type “proxies” in the search field
- Click “Proxies” in the search results to see a list of proxy protocols

- Set up a proxy:
- Automatic setup: enable the “Automatic proxy configuration” option – you'll get the PAC file path in the “URL” section
-
Manual setup:
- Enable the “Web Proxy (HTTP)” or “Secure Web Proxy (HTTPS)” option
- Enter your proxy details into the “Server” and “Port” sections
Ensure the PAC file is saved on your computer, and there’s a complete path to it.
Learn how to manage multiple Reddit accounts safely – check out our Reddit proxy & antidetect guide for tips on avoiding bans, blocks, and detection.


