


LinkedIn Insight Tag is a lightweight JavaScript tag that connects your website activity with LinkedIn Campaign Manager, helping you measure conversions, understand visitor behavior, and build audiences for future campaigns. In this guide, you’ll learn how the Insight Tag works, how to install and verify it, how to set up conversion tracking, and which common configuration mistakes can affect your LinkedIn tracking data.
For advertisers, the tag closes an important measurement gap between someone clicking a LinkedIn ad and taking action on your website. Once installed correctly, it can help you understand which campaigns contribute to conversions and provide the data needed for more informed optimization.
Reliable tracking depends on more than simply adding the code. Tag placement, consent settings, conversion configuration, and testing all matter if you want useful reporting.
For teams managing multiple LinkedIn workflows, Multilogin cloud phones can complement this setup by providing separate mobile environments for different account sessions and device profiles, while the Insight Tag handles website-side conversion measurement. Together, they address different parts of the workflow: account environment management and campaign tracking.
Read on to learn how to set up the LinkedIn Insight Tag correctly and make your conversion data more reliable.
👉 Try Multilogin for free and organize your LinkedIn workflows in separate cloud phone environments.
What Is the LinkedIn Insight Tag?
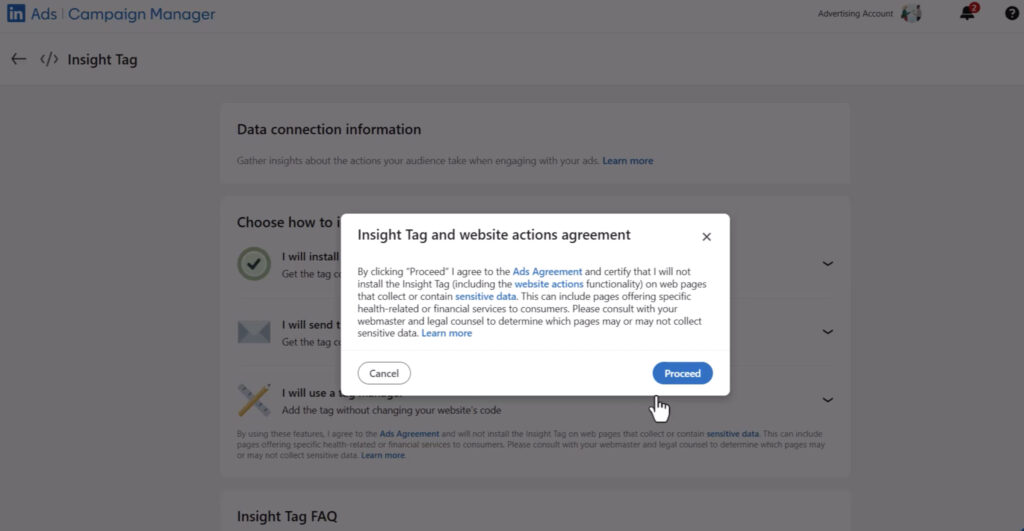
The LinkedIn Insight Tag is a lightweight tracking pixel that links your website’s traffic back to your LinkedIn ad account.
Think of it as a listening device, minus anything sinister. Once installed, it sits on every page you add it to and reports back: someone from LinkedIn clicked your ad, landed here, and did (or didn’t) do something worth caring about. That “something” could be filling out a form, downloading a whitepaper, or just visiting a specific page.
Without it, LinkedIn Campaign Manager can tell you how many clicks an ad got. With it, LinkedIn can tell you what happened after the click. That distinction is really the whole point of tracking pixels in general, not just this one.
What Data Does the Insight Tag Collect?
Mainly it collects browsing behavior, device and browser details, and (where the visitor is a logged-in LinkedIn member) professional attributes tied to their LinkedIn profile.
Here’s roughly what ends up in the data set:
| Data Type | What It Includes |
|---|---|
| Page activity | Pages visited, time on site, button clicks, form submissions |
| Device signals | Browser type, device type, operating system |
| Network data | IP address, general location |
| Professional data (matched members) | Job title, company, industry, seniority |
| Ad interaction | Which campaign or ad drove the visit |
Not every visitor gets matched to a full LinkedIn profile. Anonymous, unmatched visits still count toward aggregate reporting, they just won’t show up in the demographic breakdowns.
Main Use Cases
The Insight Tag isn’t a single feature, it’s really the foundation that a handful of other features sit on top of.
- Conversion tracking. Measure signups, downloads, demo requests, whatever counts as a win for your campaign.
- Website audiences (retargeting). Build a list of people who visited your site and show them ads later, even if they didn’t convert the first time.
- Campaign optimization. LinkedIn’s delivery algorithm uses conversion signals to find more people likely to convert, not just more clicks.
- Reporting and demographics. See job titles, company size, and industry breakdowns for your visitors, which is genuinely useful for a B2B audience.
If you only care about one of these, conversion tracking, install the tag anyway and enable the rest later. Historical data doesn’t back-fill itself. A tag installed today can’t tell you anything about last month.
Step-by-Step Setup in LinkedIn Campaign Manager
Here’s the current path, and yes, LinkedIn has reorganized this menu more than once, so don’t be surprised if an older screenshot online doesn’t quite match what you see.
- Sign in to Campaign Manager and select the correct ad account from the account switcher in the top left. Easy to skip, easy to regret if you’re managing more than one account.
- Go to Data in the left-hand navigation, then click Signals Manager.
- Scroll to the Sources section and select Insight Tag.
- If you haven’t created one yet, click Create Insight Tag. LinkedIn generates a unique partner ID tied to your account. Write this down somewhere sensible.
- Choose how you want to install it: paste the code yourself, hand it to a developer, or use a tag manager.
Older Campaign Manager layouts routed this through Analyze > Insight Tag instead. If your interface still shows that path, the steps underneath are functionally the same.
Installing the Tag Manually
If you have direct access to your site’s HTML, this is genuinely the simpler route.
Copy the full JavaScript snippet from Campaign Manager and paste it into the <head> section of every page you want tracked, right before the closing </head> tag. If your site runs off one shared header template (most do), you only need to touch it once.
One small but easy mistake: copying the code from a source that swaps straight quotes for curly ones. LinkedIn specifically calls this out, and a broken quotation mark can silently break the whole script.
Installing Through a Tag Manager
If you’re using Google Tag Manager, you’ll use the partner ID rather than the raw code:
- Sign in to tagmanager.google.com and open the right container.
- Create a New Tag, then under Tag Configuration choose Discover more tag types in the Community Template Gallery.
- Search for the LinkedIn Insight Tag 2.0 template and add it.
- Enter your partner ID, set the trigger (usually “All Pages”), and publish the container.
This method is a lot easier to manage if multiple people touch your tracking setup, since nothing lives buried in a template file only one developer remembers editing.
How to Verify the Insight Tag Is Working
Check the source status in Signals Manager. If it says Active, the tag is firing correctly. If it says Unverified, LinkedIn simply hasn’t received a signal yet.
Unverified doesn’t always mean broken, sometimes it just means nobody with an ad-blocker-free browser has visited the page recently. Still, before assuming that, check the obvious culprits: the tag copied incompletely, it’s only on some pages, or a consent banner is blocking it before anyone can accept.
Browser extensions built for tag debugging (there are a few free ones) will show you in real time whether the pixel is actually firing when you load your own site.
Configuring Conversion Tracking
Conversions live on their own inside Campaign Manager, separate from the tag itself.
- From Campaign Manager, click Create conversion and select Insight Tag conversion.
- Name it something you’ll actually recognize in three months.
- Pick the behavior you’re tracking (Download, Sign up, Purchase, and so on) from the key conversion behavior dropdown.
- Optionally assign a monetary value, useful if you’re comparing return on ad spend across campaigns.
- Choose an attribution model, this decides how credit gets split when someone interacts with more than one ad before converting.
You can also build conversions straight from Website Actions, which automatically captures button clicks and page visits once the tag is live, no extra code required.
Common Setup Mistakes and Troubleshooting
| Mistake | What Usually Happens |
|---|---|
| Tag only added to homepage | Conversions on inner pages never get counted |
| Copied code with curly quotes | Script fails silently, no error shown |
| Consent banner blocks tag by default | Reporting looks fine, but numbers are quietly too low |
| Tag added to sensitive pages (health, financial data) | Violates LinkedIn’s own usage terms |
| Multiple tags fired for the same account | Duplicate or inflated conversion counts |
Honestly, the most common issue isn’t technical at all. It’s forgetting the tag exists after a website redesign. New template, no tag, weeks of missing data before anyone notices the dip in reporting.
Privacy, Consent, and Data Considerations
Here’s something worth being blunt about: the Insight Tag needs explicit, opt-in consent before it fires for visitors in the EU and UK, and that’s true regardless of whether your audience is “just professionals.” GDPR doesn’t treat B2B traffic as lower risk. A person browsing your site for work still has the same individual rights.
Practically, that means gating the tag behind your consent management platform or tag manager, not relying on LinkedIn’s own settings to handle it for you. If a visitor rejects tracking cookies, the tag shouldn’t load at all, full stop.
For California visitors, sending data to LinkedIn for retargeting purposes typically counts as a “sale” or “share” under CCPA and CPRA, which brings its own disclosure obligations.
Best Practices for Accurate LinkedIn Tracking in 2026
- Install the tag site-wide through a shared template, not page by page, so nothing gets missed later.
- Enable enhanced conversion tracking where possible, since it improves first-party cookie accuracy compared to older image-pixel setups.
- Audit your tag after every site redesign or CMS migration. This is the single most common cause of silent tracking gaps.
- Separate your Insight Tag conversions from image-pixel conversions when comparing accuracy, they’re not measured the same way.
- Review your consent setup at least twice a year. Regulations shift, and so does how browsers and consent tools handle third-party scripts.