How to enable 2FA (two-factor authentication) with Postman
 ~3 minWritten by Yelena V
Use the Multilogin 2FA endpoints in Postman to set up and manage 2FA for an email-and-password account.
➡️ Import the Multilogin API collection → authenticate your Postman requests → run “Set up 2FA” → add the generated authenticator entry → send the current code with “Enable 2FA”.
If you sign in to Multilogin with Google, Apple, or another social provider, manage 2FA with that provider instead of Multilogin.
If you rather do it via Multilogin CLI tool, follow our CLI article How to enable 2FA in CLI.
Before you start
Use this workflow only if you sign in to Multilogin with an email and password.
If you sign in with Google, Apple, or another social provider, manage 2FA through that provider instead of Multilogin.
Make sure:
- Postman is installed
- The Multilogin API collection is imported
- Your Postman requests use a valid Multilogin API token
- You sign in to Multilogin with an email and password
- You have a compatible authenticator app ready
How to set up Google Authenticator
Use a compatible authenticator app, such as Google Authenticator or Microsoft Authenticator, to generate your 2FA codes.
- Download Google Authenticator in your app store (iOS, Android)
- Open the app → sign in to your Google account
- Click the plus (+) icon at the lower right area
- Choose “Enter a setup key”. You’ll enter the key locally in the next section instead of using an online QR converter.
How to use 2FA endpoints with Postman
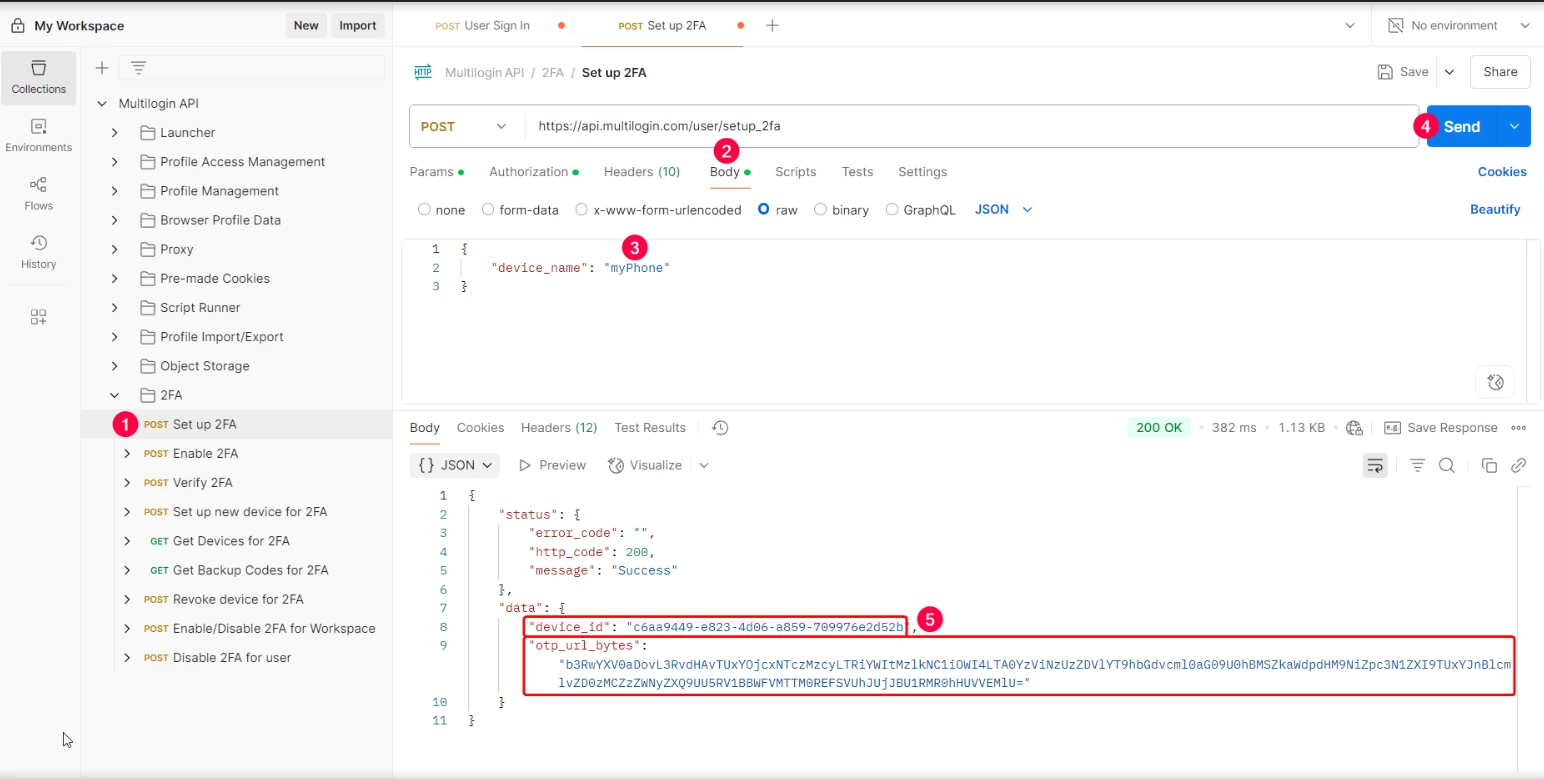
How to set up 2FA for a user
- Go to the Documenter page and locate or import the 2FA endpoints
- Use the “Set up 2FA” endpoint to get your
device_idandotp_url_bytesobjects - Keep
device_idfor the next request. Decodeotp_url_byteslocally with the Python 3 example below. Do not paste it into a website, chat or support ticket. - Save the example as
decode_2fa.py, runpython3 decode_2fa.py(orpython decode_2fa.pyon Windows), then pasteotp_url_bytesat the hidden prompt. The script makes no network requests. - In your authenticator app, add an account manually using the displayed account name and
Secret. Select time-based codes. Match the displayed algorithm, digit count and period; if your app cannot match them, use a compatible authenticator instead of changing the values. - Continue with “Enable 2FA” below using the current code. After setup, clear the copied setup information from your clipboard and close the terminal. Keep the secret private.
Local decoding example (requires Python 3). It displays the setup key only on your computer; no QR-conversion website is needed.

import base64
import getpass
from urllib.parse import parse_qs, unquote, urlparse

encoded = getpass.getpass("otp_url_bytes: ").strip()
uri = urlparse(base64.b64decode(encoded, validate=True).decode("utf-8"))
if uri.scheme != "otpauth" or uri.netloc != "totp":
    raise ValueError("Expected a time-based otpauth setup URI")
settings = parse_qs(uri.query)
secret = settings.get("secret", [""])[0]
if not secret:
    raise ValueError("The setup URI has no secret")
print("Account:", unquote(uri.path.lstrip("/")))
print("Secret:", secret)
print("Algorithm:", settings.get("algorithm", ["SHA1"])[0])
print("Digits:", settings.get("digits", ["6"])[0])
print("Period:", settings.get("period", ["30"])[0])
How to enable 2FA for a user
- Go to “Enable 2FA” endpoint → head over to “Body”
- Use your previously obtained
device_id - Type the code from Google Authenticator in
totp_code→ press “Send” - Your backup codes will be generated → store them in a safe place
- A success message will appear in the output
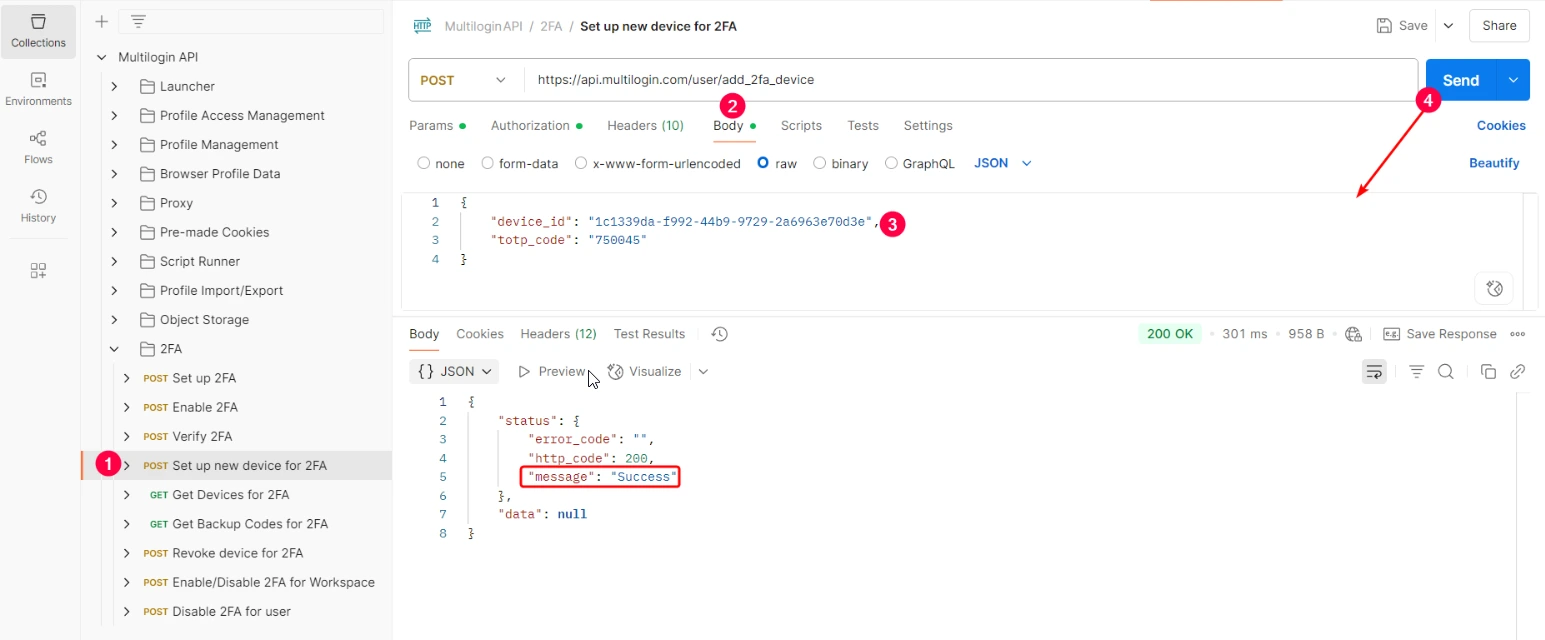
How to set up 2FA for a new device
- Get the new
device_idvia “Set up 2FA” endpoint - Go to “Set up new device for 2FA” endpoint
- Fill in the new
device_id - Insert the code from Google Authenticator in
totp_code→ press “Send” - A success message will appear in the output
How to enable/disable 2FA from workspace
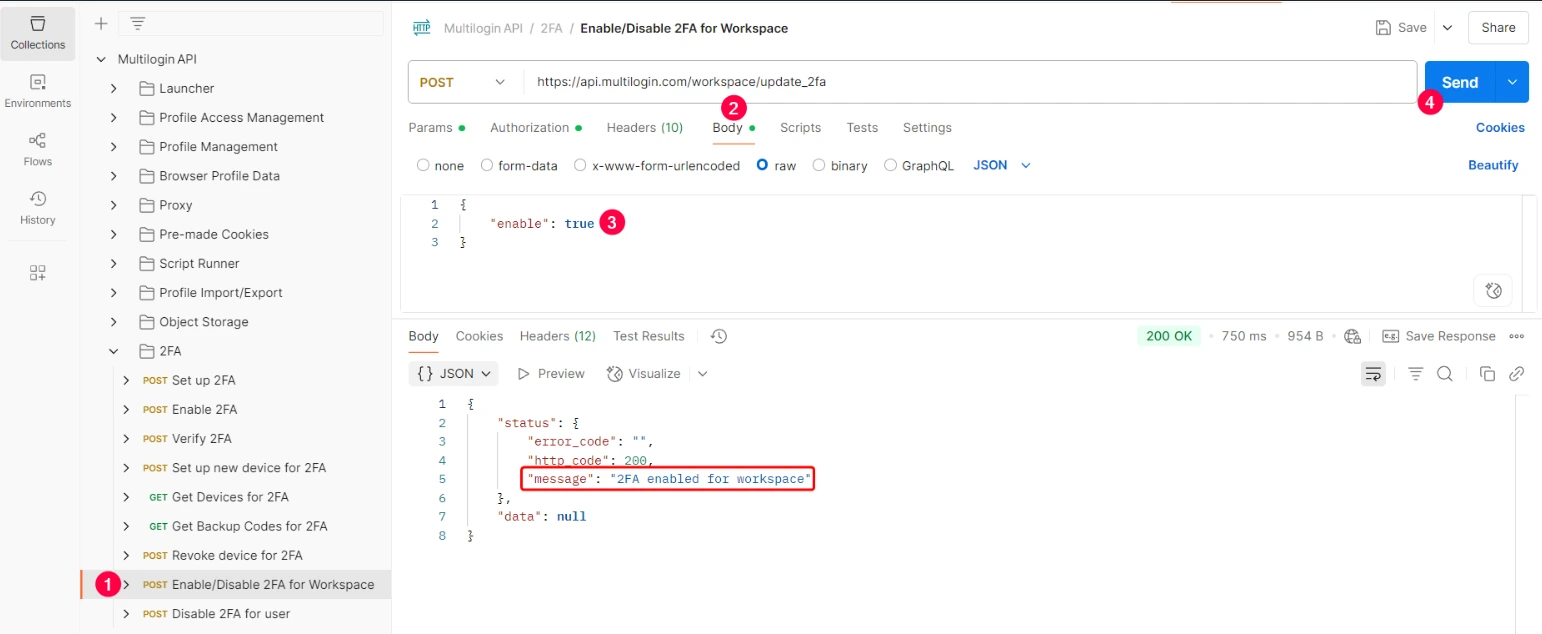
- Go to “Enable/Disable 2FA for workspace” endpoint
- On the “Body” tab → select
trueorfalseto activate/deactivate it - Click “Send” → a confirmation message will appear
How to remove 2FA from a device
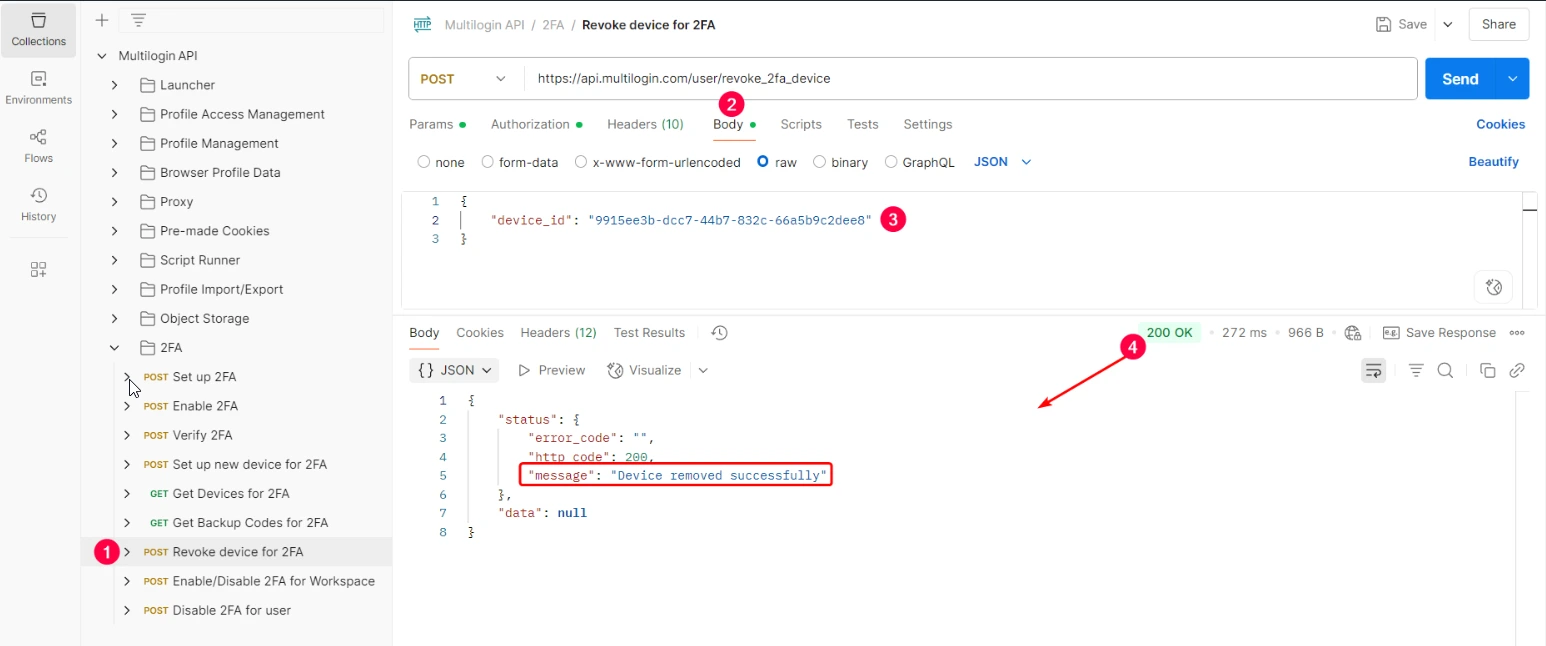
- Go to “Revoke device for 2FA” endpoint
- Go to “Body”
- Fill in the
device_idyou wish to remove → press “Send” - A success/failure message appears as output