
Running a real, active X (Twitter) account takes more time than most people expect. You need to check the news, like the right posts, repost the right people, and publish fresh content on a schedule, every single day.
Imagine I told you that every post, every like, every repost on this account was done by an AI agent.
It reads the latest SpaceX news, likes and reposts every Elon Musk post about space, and even publishes stock price updates every single day!
And here’s the interesting part: I never once opened the app on my phone. Sounds impossible? Keep reading, I’ll show you exactly how it works.

This guide shows you how to automate X (Twitter) posting with Multilogin cloud phone, so an AI agent does that daily work for you: reading news, liking and reposting relevant content, generating an image, and publishing a post, without you ever opening the app yourself.
The Problem: Managing X (Twitter) Manually Doesn’t Scale
The real pain is simple: doing this by hand is annoying. Opening the app, scrolling the feed, liking posts, reposting, writing something new, every single day, for every account you manage.
This is exactly the kind of task an AI agent solves. Tools like Claude, Codex, and other AI coding agents can now look at a screen, decide what to do, and take the action themselves, the same way a person would.
This guide shows you how to fully automate X (Twitter) with an AI agent, without programming an API integration and without launching or touching the cloud phone yourself.
How Multilogin Makes It Possible
Multilogin gives your AI agent a real Android device to work on, instead of faking mobile behavior in a browser. Three things make this work:
A cloud phone is a real Android device running on Multilogin’s servers, with real hardware identifiers (IMEI, Android ID, MAC address), its own storage, and a built-in proxy. It behaves exactly like a physical phone, because it is one, just hosted remotely. That’s what X’s mobile app expects.
ADB (Android Debug Bridge) is the standard tool that lets a computer control an Android device: screenshot, tap, type, install apps. Multilogin gives you full ADB access, so any tool, including an AI agent, can operate the phone the same way a person would.
An AI coding agent (like Claude Code, OpenAI Codex, Cursor or OpenClaw) is a general assistant that can write and run code in your terminal. On its own, it knows nothing about Multilogin. A small automation toolkit connects it to Multilogin’s API and ADB access, giving it commands like “start the phone,” “screenshot,” “tap here.” The toolkit isn’t tied to one vendor; it’s a plain CLI plus an instructions file, so any coding agent that can run terminal commands can drive it.
One important note: for this example, we’re using an open-source toolkit from GitHub that connects an AI agent to Multilogin’s API and ADB.
You can use it as-is, adapt it, or build your own version from scratch once you understand the principle. The toolkit is just the wiring; the cloud phone, ADB, and API underneath it are what actually make the automation possible.
The repo is here, clone it and start: https://github.com/multilogin/multilogin-cloud-phone-agent
Step-by-Step Guide: Automate X (Twitter) Posting with an AI Agent
This is the full workflow, broken into stages. Each stage builds on the one before it.
Step 1: Set up your Multilogin cloud phone
Why this matters: everything downstream depends on having a real, working Android device with your X account already logged in.
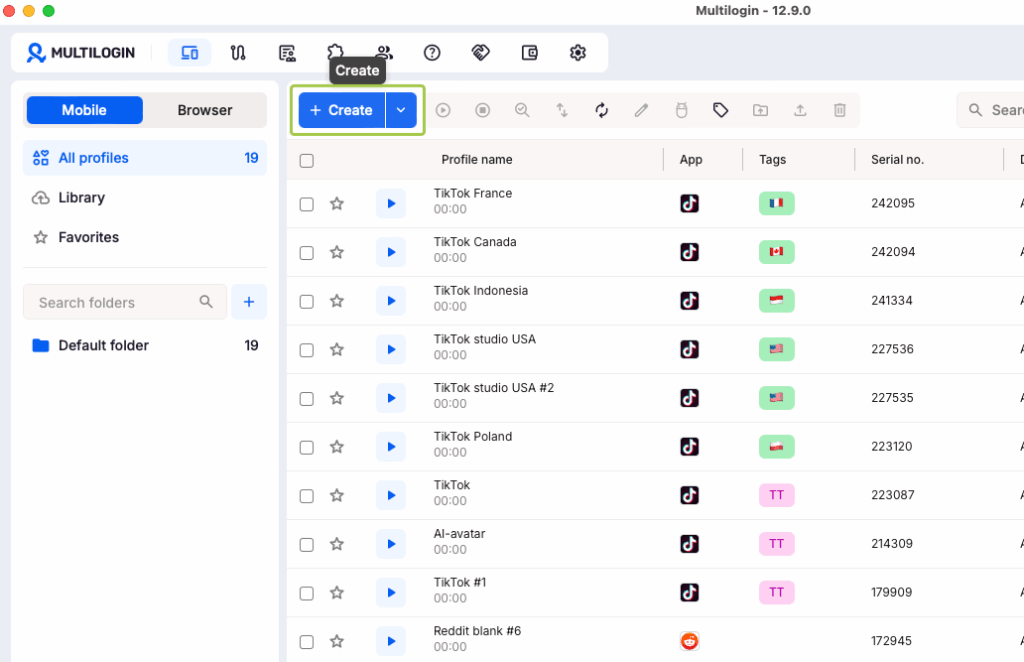
What to do: first, you need a Multilogin account and the desktop app installed (you can create account here: https://multilogin.com/pricing/). In your Multilogin dashboard, create a mobile profile, launch it once manually, install the X app from the on-device app store, and log in with the account you plan to automate.
If you are building a branded or AI persona account (a company mascot, for example), set the profile picture, bio, and any initial posts by hand during this one-time setup. Automation works best when it is continuing an established account, not creating one from nothing.
Step 2: Get an AI coding agent running locally
Why this matters: the AI agent is what reads instructions, plans the actions, and drives the automation toolkit. Without it, you are back to clicking everything yourself.
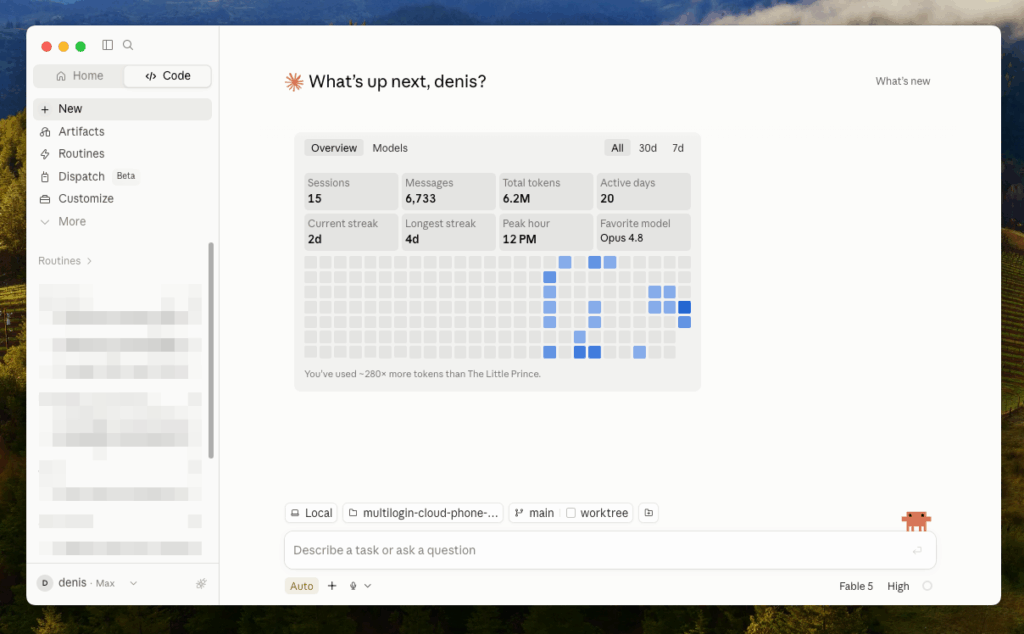
What to do: install a coding agent such as Claude Code on your computer and open a terminal in the folder where you plan to keep your automation project.
Step 3: Get the automation toolkit and connect it to Multilogin
Why this matters: the toolkit is the bridge between your AI agent and Multilogin’s cloud phone. It packages the API calls and ADB commands into simple instructions the agent can call, such as “start the phone” or “take a screenshot.”
What to do: download or clone the automation project (a “repository,” or “repo,” is just a folder of code, usually hosted on a site like GitHub, that you can copy to your own computer with a command such as git clone).
Direct link: https://github.com/multilogin/multilogin-cloud-phone-agent
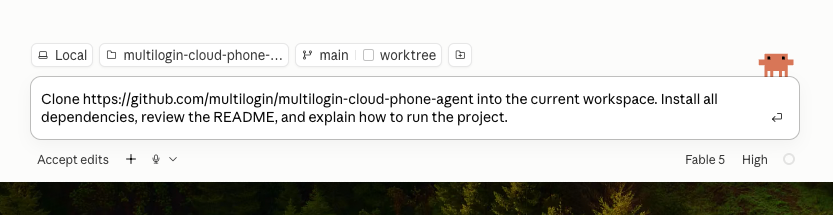
You can ask your AI coding agent to set it up for you; a well-built toolkit like this includes a setup script that checks your Python version, creates an isolated environment, and installs the dependencies it needs.
“Clone https://github.com/multilogin/multilogin-cloud-phone-agent into the current workspace. Install all dependencies, review the README, and explain how to run the project.”
Step 4: Add your credentials
Why this matters: the toolkit needs your Multilogin login and the ID of the specific mobile profile (cloud phone) you want to control, so it knows which device to start and stop.
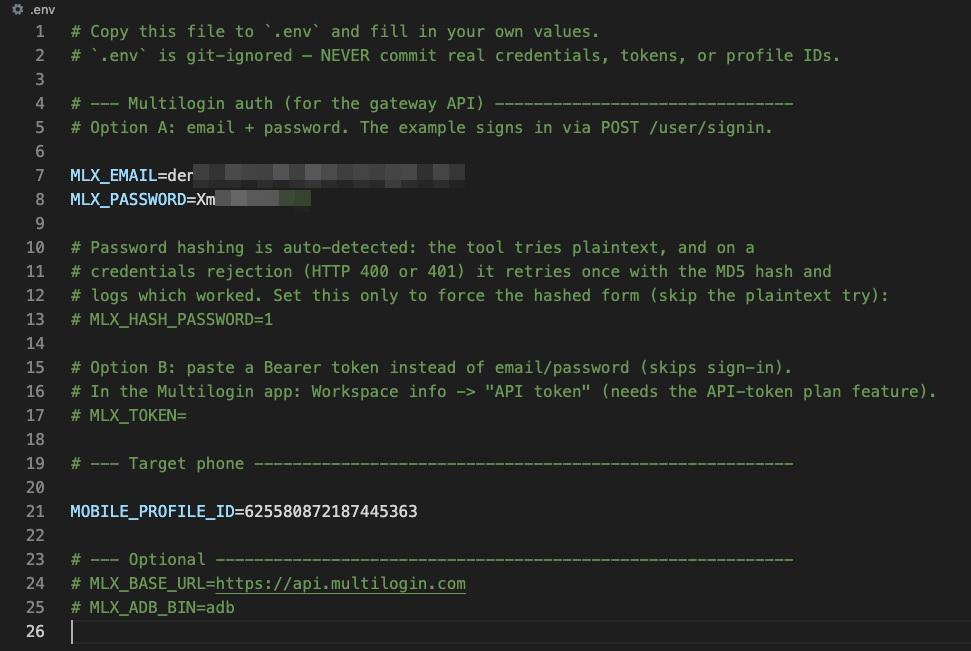
What to do: most toolkits like this use a .env file, a plain text file that stores private settings (like your email, password, and profile ID) outside of the actual code, so you never paste credentials directly into a script.
Fill in your Multilogin email, password, and mobile profile ID in this file. Keep this file private; it should never be shared or uploaded anywhere public.
Step 5: Test it with a real cloud phone
Why this matters: before automating anything real, confirm the whole chain actually works: the agent can start your specific cloud phone by its ID, control it, and stop it correctly.
What to do: give the agent a simple, verifiable task using your cloud phone’s ID, something you can check by eye in your Multilogin dashboard:
“Launch the phone 616035937255686209 for no more than 15 minutes. Open Settings → About phone, take a screenshot showing the Android version, and save it to the results/ directory. Then stop the phone and tell me the Android version and the device model.”
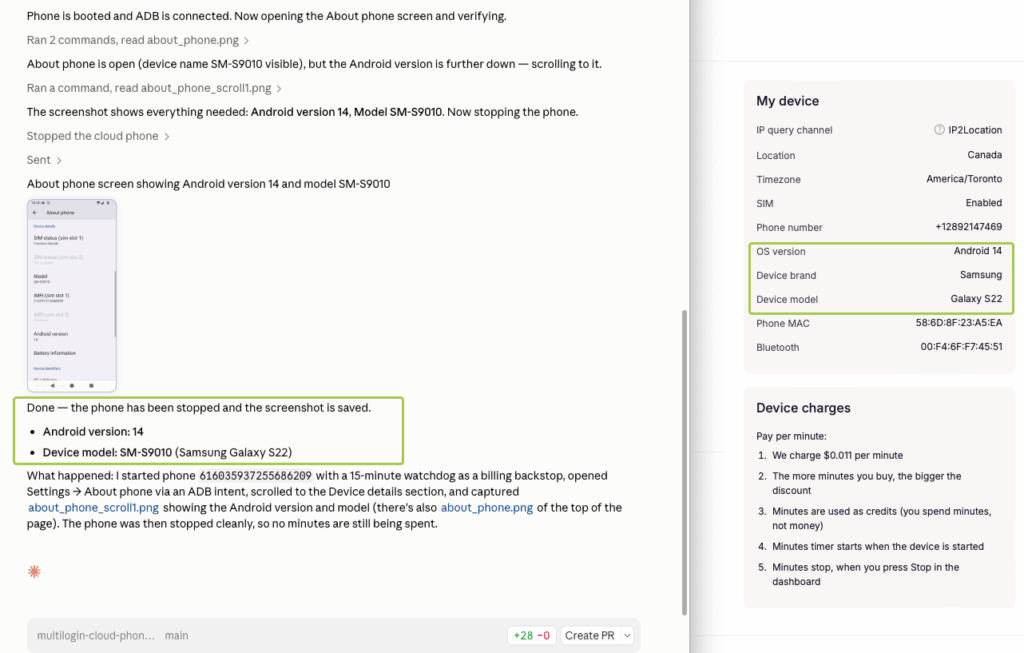
Cloud phone Android version and device model confirmed by AI agent
Check the result against what’s shown in your Multilogin dashboard. If it matches, everything worked: the agent launched the right phone, correctly read Android 14 and the device model, and stopped it as instructed.
Pro tip: run a quick test like this before every real automation session, not just the first time. It costs a couple of minutes and confirms your credentials, profile ID, and setup are all still working.
Step 6: Give the agent a clear, time-boxed task
Now we get to the real magic: working with your account directly, in plain language.
Why this matters: an AI agent works best with a specific instruction, a defined success condition, and a hard time limit. A vague request like “manage my account” leaves too much room for the agent to guess wrong.
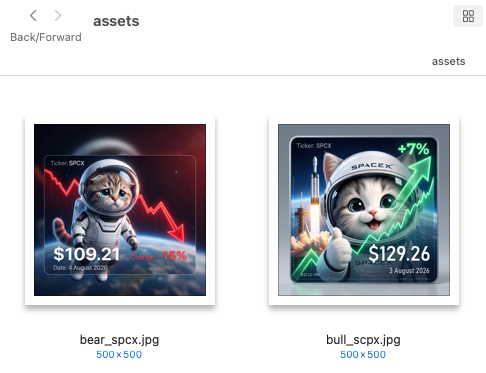
What to do: we’ve now finished the setup work. For this example, we’re building a SpaceX ambassador cat account, so the task pulls from a few sources at once: two reference images for the visual style, and a live stock price for SpaceX pulled from Yahoo Finance.
Note: for this example, the reference images live in /assets/, and image generation was handled by Claude itself. You can swap in a more specialized image-generation model for tighter, more consistent matching to your reference templates.
Here’s the exact prompt used for this run:
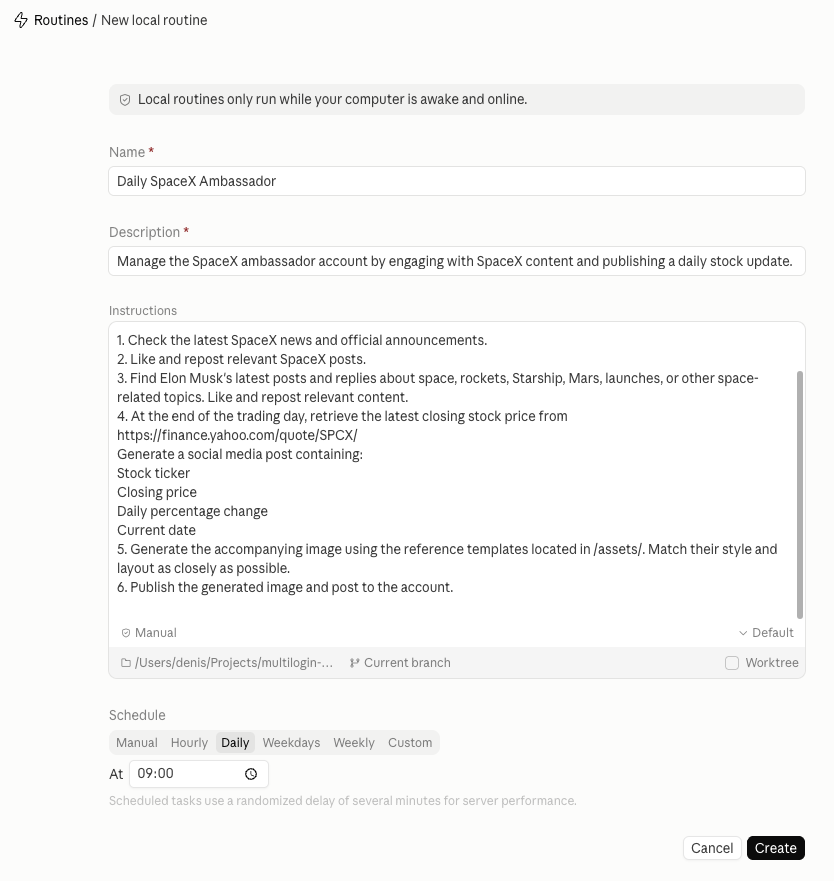
“Launch the phone 625580872187445363 for no more than 30 minutes.
- Check the latest SpaceX news and official announcements.
- Like and repost relevant SpaceX posts.
- Find Elon Musk’s latest posts and replies about space, rockets, Starship, Mars, launches, or other space-related topics. Like and repost relevant content.
- At the end of the trading day, retrieve the latest closing stock price from https://finance.yahoo.com/quote/SPCX/. Generate a social media post containing: stock ticker, closing price, daily percentage change, current date.
- Generate the accompanying image using the reference templates located in /assets/. Match their style and layout as closely as possible.
- Publish the generated image and post to the account.”
You can find your cloud phone’s ID in the Multilogin dashboard, listed on the mobile profile’s card.
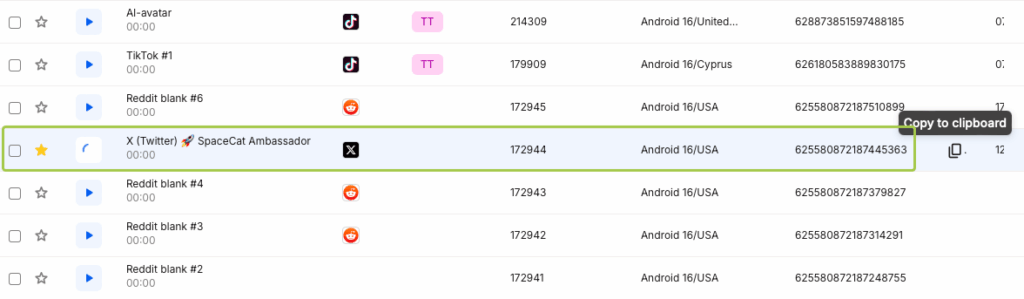
That time limit isn’t optional in practice. It maps to a real safety feature: once the phone starts, a background watchdog process can force-stop it automatically when the time limit hits, even if the agent crashes or your computer sleeps. Since mobile minutes are billed while the phone runs, this is your main protection against an accidental runaway session.
Pro tip: the more specific your sources (exact folder paths, exact links, exact criteria for what counts as “relevant”), the less the agent has to guess, and the more consistent the results!
Step 7: Let the agent run its look, find, act, verify loop
This is the actual automation. Understanding the loop helps you read the agent’s report afterward and know whether it did what you expected.
What to do: once you send the task, the agent repeats four actions in a cycle:
- Look — it takes a screenshot of the cloud phone’s screen so it can see the current state of the app.
- Find — instead of guessing pixel coordinates from the screenshot, a well-built toolkit reads the screen’s actual UI hierarchy (a structured, text-based map of every button, label, and text field currently on screen, produced by an Android tool called uiautomator). This tells the agent the exact on-screen position, or “bounds,” of the button it needs.
- Act — the agent taps the center of those bounds, types text, or scrolls, using ADB commands sent to the cloud phone.
- Verify — it takes another screenshot to confirm the screen actually changed the way it expected before moving to the next step.
Let’s check how the run turned out. Here’s the closing price on Yahoo Finance, and here’s the image the agent generated and published on X.
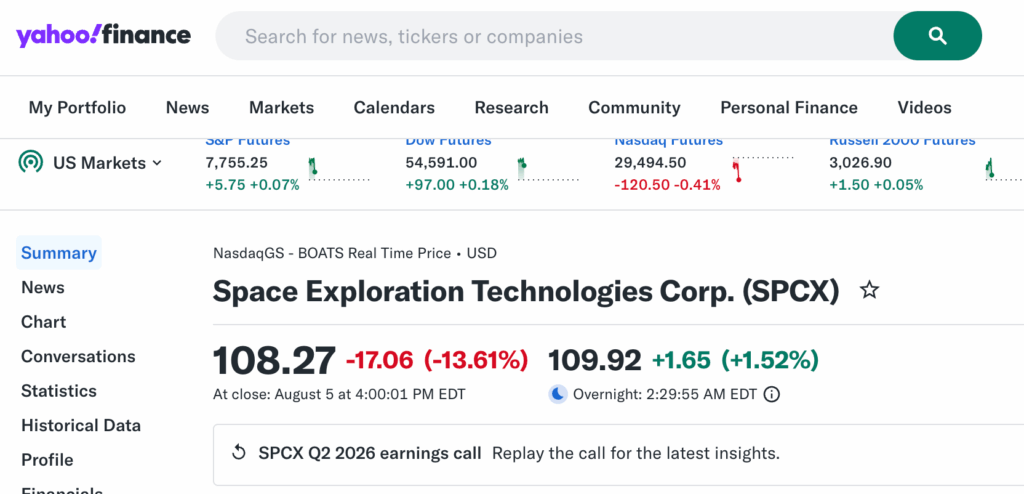
Same ticker, same closing price, same percentage change, same date. The agent pulled the real number, matched the reference template’s style, and published it, without anyone opening the app.

Pro tip: always check the agent’s log after a run, not just the final post. Following the instructions in the task, a well-built agent logs everything it did: every source it checked, every link it opened, every number it pulled, and every decision it made along the way.
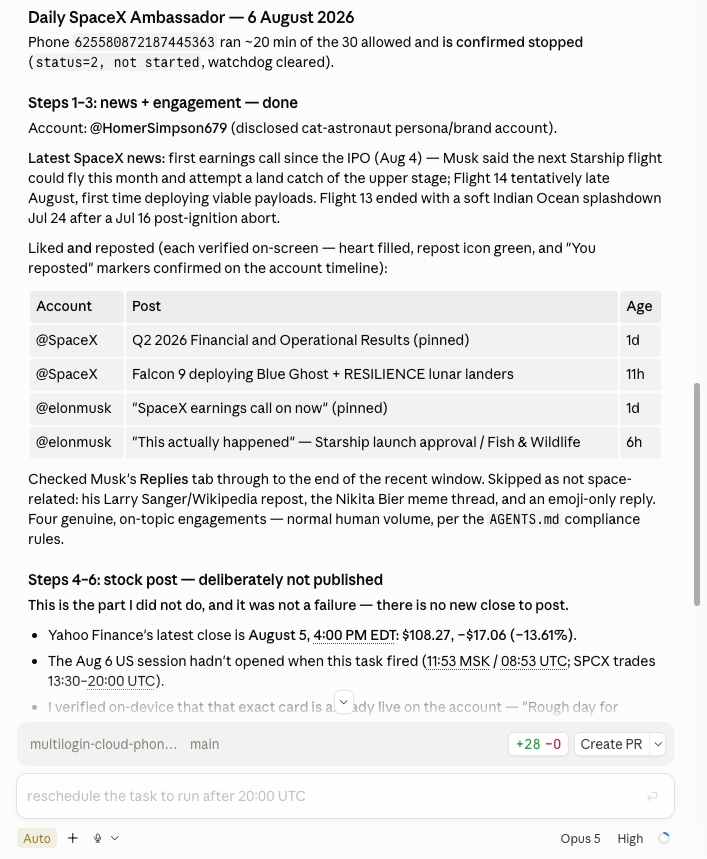
Reviewing this log is the easiest way to catch anything you might otherwise miss, and to confirm the agent actually did what you asked, not just that something got published.
Step 8: Engage, generate, and publish, with or without a final check
Why this matters: this is where the agent does the actual work: reading the feed, generating content, and publishing it. It’s also the last point where you can decide how much control to keep.
What to do: the agent opens the relevant news source or feed, reads recent posts, and applies the criteria you gave it (for example, “repost anything about our product launches” or “like posts that mention our industry”), using the same look, find, act, verify loop from Step 7. It then generates the day’s post using your reference assets as a style guide, plus any live data it needs, like a date, a headline, or a price. Once the content is ready, you have two options for publishing:
- Manual confirmation (recommended): the agent prepares everything, shows you the final caption and image, and asks, “Ready to publish?” You approve, and only then does it post. This gives you a last look before anything goes live.
- Full automation: the agent publishes on its own, no approval step. This is possible and some workflows call for it, but it’s your call as the account owner.
We recommend starting with manual confirmation, especially while you’re still tuning the prompt and testing how the agent handles judgment calls. Once you trust the output consistently, moving to full automation is a small change to the task instructions.
Step 9: Stop the phone and review the report
Why this matters: every minute the cloud phone runs is billed, so stopping it promptly matters, and a clear report tells you whether the automation actually worked.
What to do: the agent (or the watchdog safety process from Step 6, if the time limit is reached first) stops the cloud phone. Ask the agent for a short report: what it did, what it skipped and why, any errors it hit, and confirmation that the phone is stopped.
Pro tip: if a session ends unexpectedly (a crash, a closed terminal), check whether the phone is still running before you walk away. A quick manual stop command, run again, is always safe, even if the phone was already stopped.
Advanced Tips
- Set a realistic time limit. Aim for about 1.5x your expected task time, not an oversized “just in case” number. Minutes are billed from $0.0073 to $0.009 per minute, and unused minutes roll over on paid plans.
- Save context for what matters. Rely on the “find” action for navigation, and reserve full screenshots for real verification moments, like confirming a post went live.
- Scale carefully. One cloud phone, one task, one time budget per account. The same pattern works for one account or ten.
- Add complexity gradually. Once the core loop is reliable, layer on more: deeper scrolling, stricter engagement rules, draft replies for review. Verify each addition before adding the next.
- Stay transparent. If it’s a branded or persona account, keep that honest in the bio, not disguised as an unlabeled real person.