


How to check profile size in Multilogin
 ~4 minWritten by Yelena V
Use your computer’s file system to check the size of a local Multilogin browser profile.
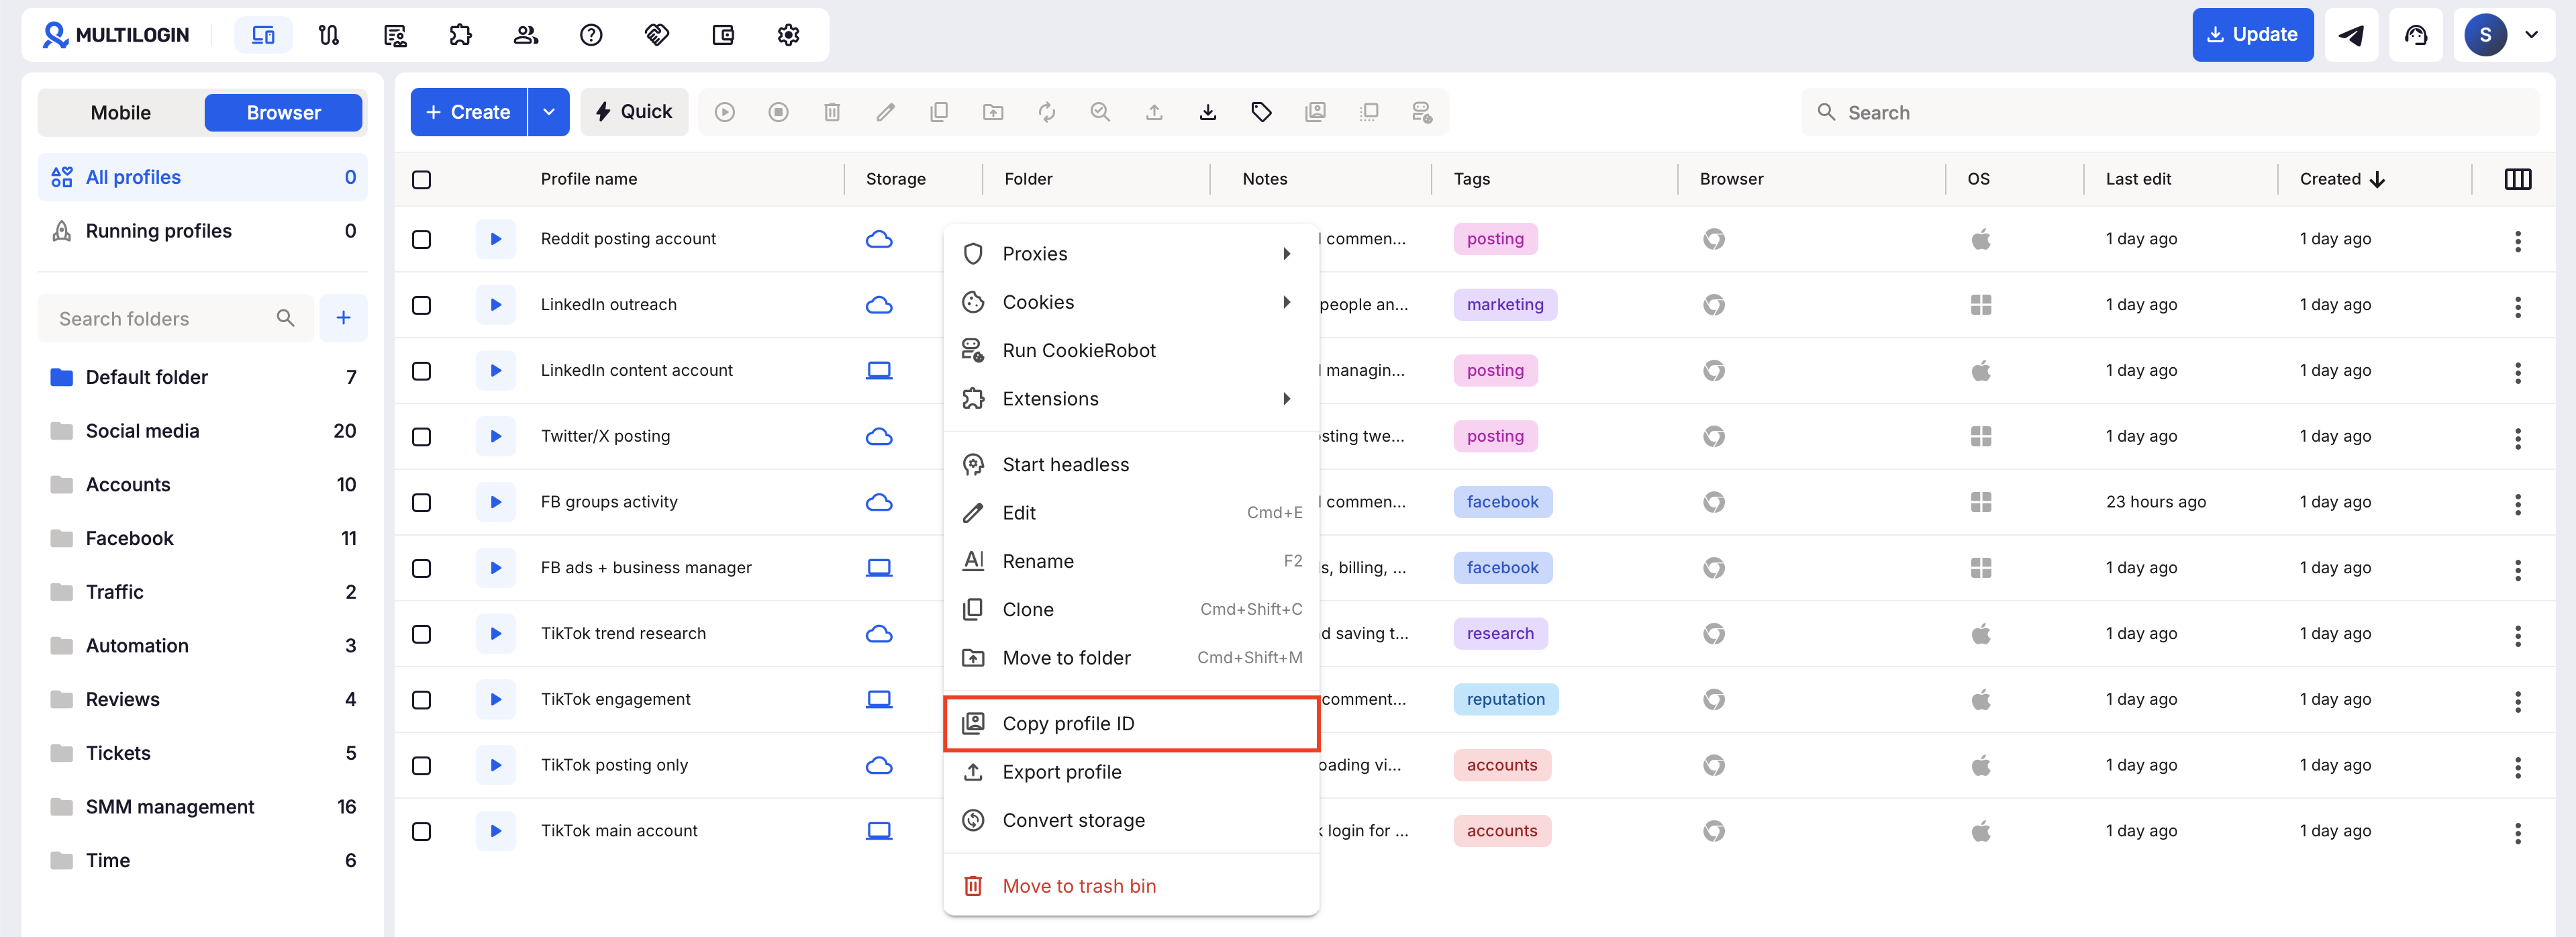
➡️ Go to “Profiles” → “Browser” → find the profile → confirm its storage type is “Device” → right-click it → click “Copy profile ID”. Then find the matching folder in your local mlx/profiles directory and check its size.
If the local profile folder isn’t available yet, start the browser profile first.
If you can't find the folder in your file system, start the profile first.
Before you start
Check the browser profile’s storage type in the “Storage” column:
- Device: use the steps below to check the local folder size
- Cloud: the profile data is stored online, so this file-system method does not show its cloud storage size
Check a local browser profile’s size before converting it to cloud storage. Local profiles must be 100 MB or smaller for local-to-cloud conversion.
Option 1: use the file system search
- Go to “Profiles” → “Browser”.
- Right-click the profile you need and click “Copy profile ID”
- Open the “profiles” folder in your file system:
-
Windows:
C:\Users\%username%\mlx\profiles -
macOS:
/Users/%username%/mlx/profiles -
Linux:
/home/%username%/mlx/profiles
-
Windows:
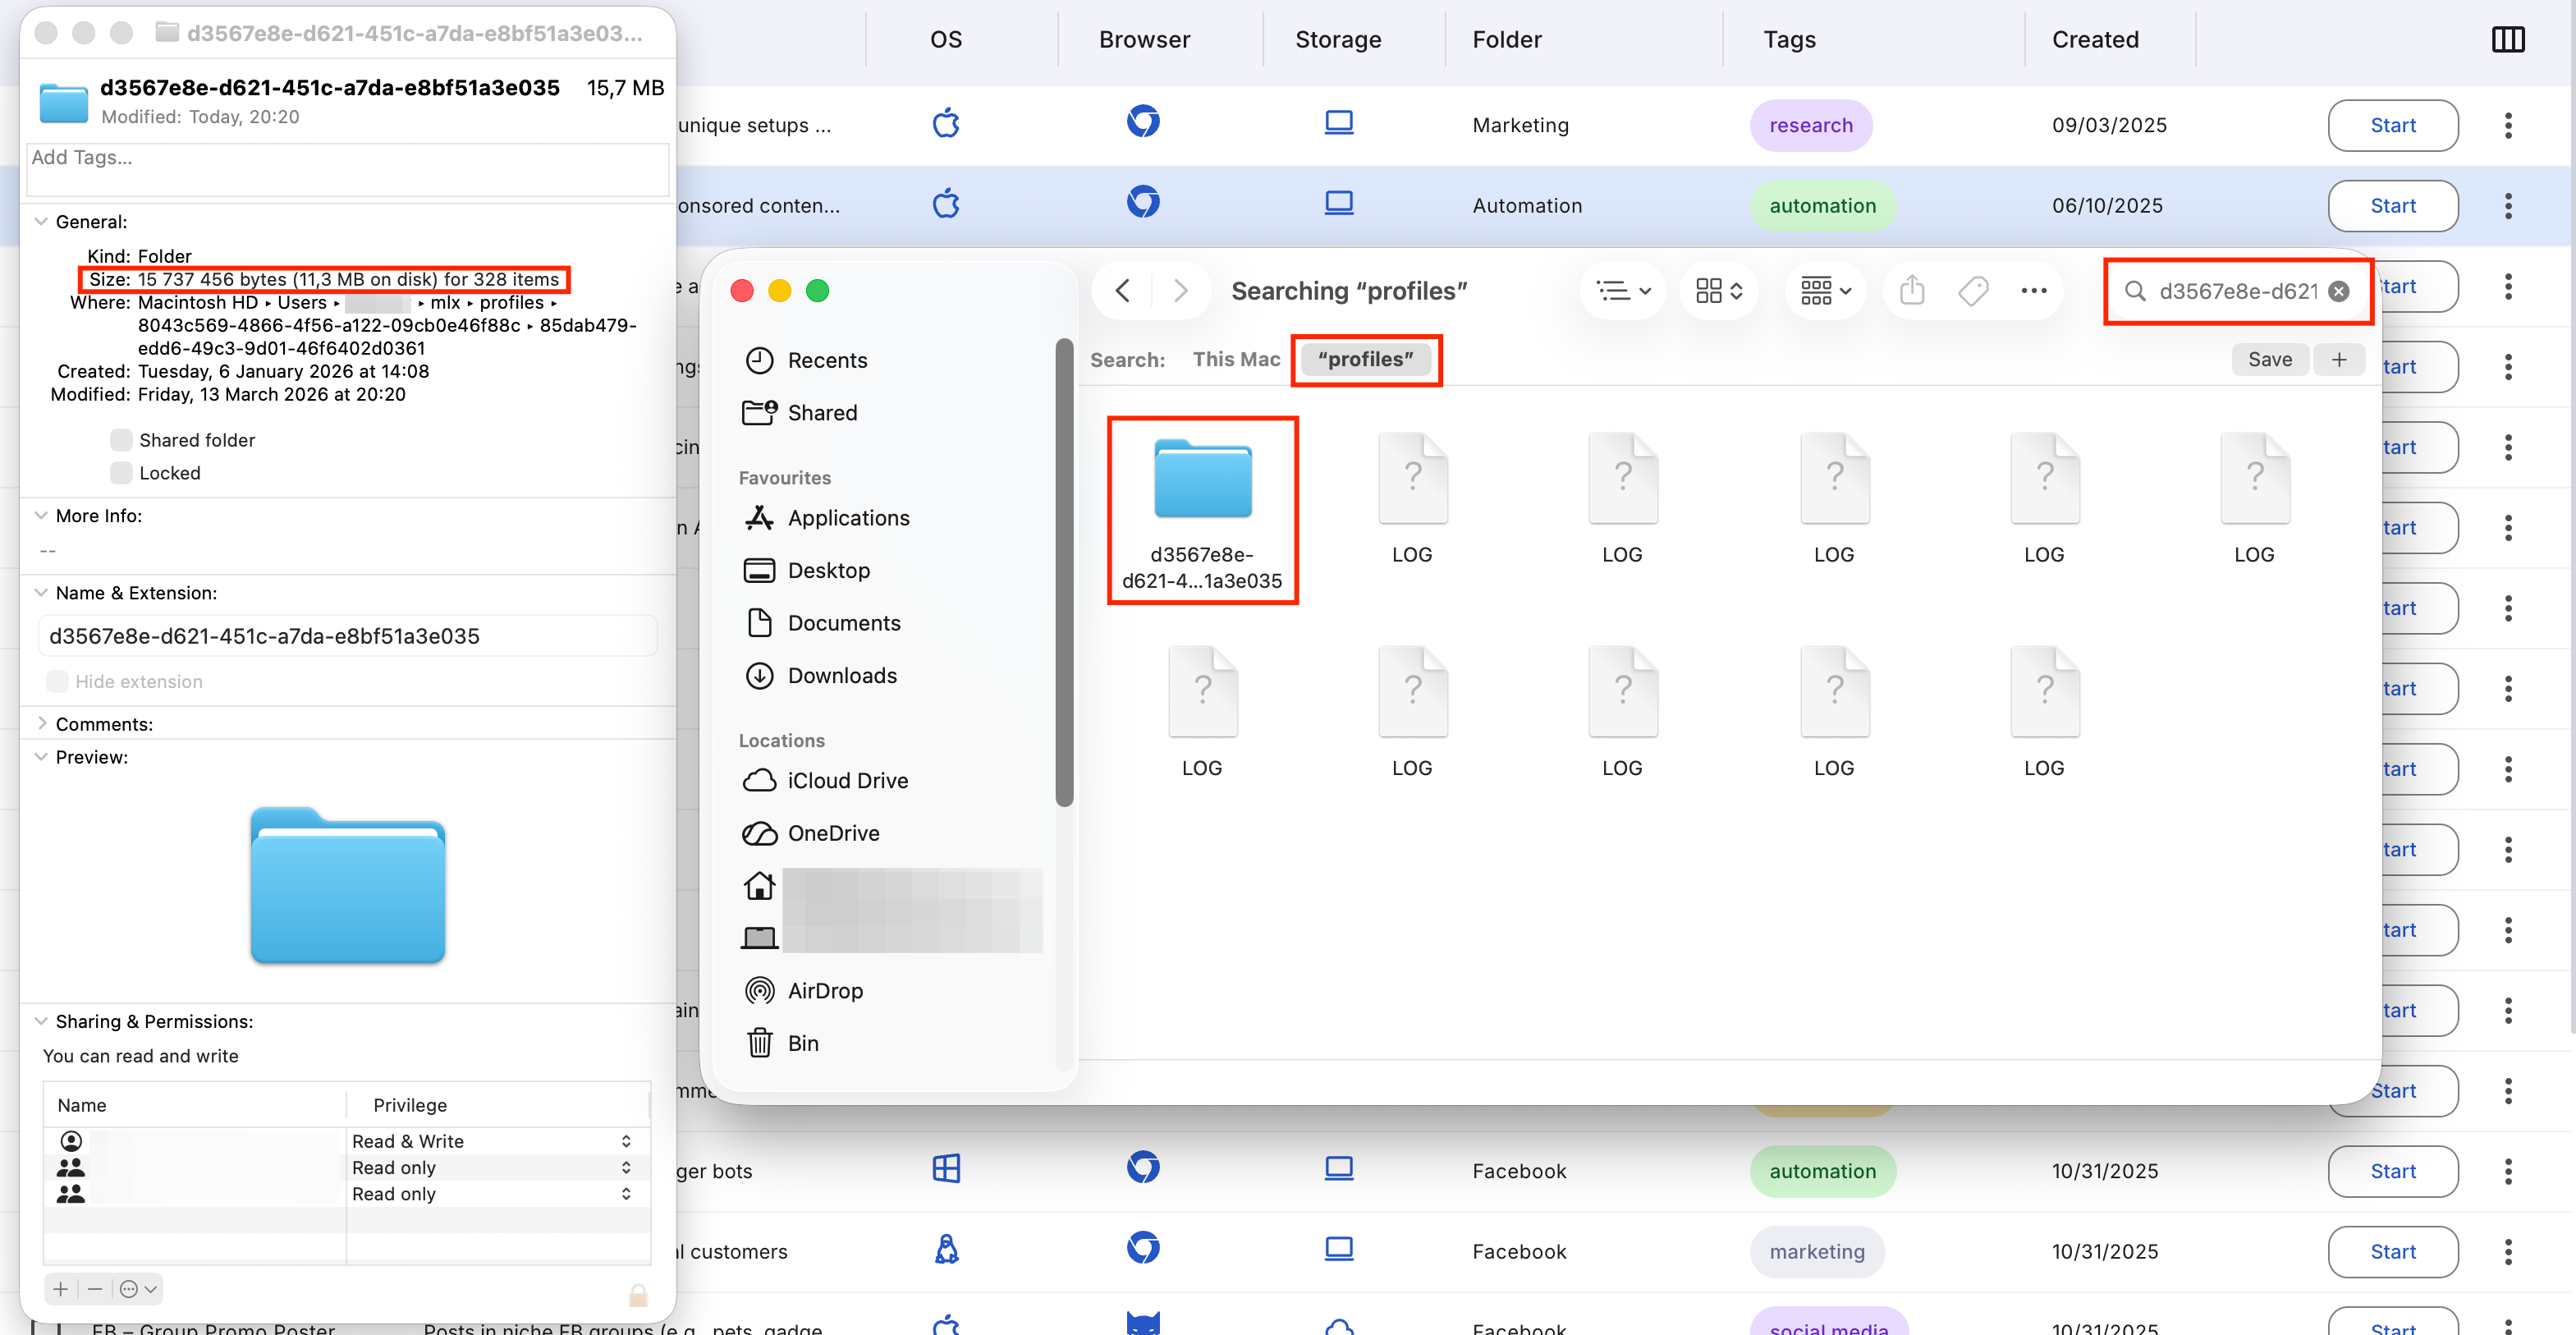
- Use your file system search to look up the copied profile ID
- Check the folder size:
- Windows: right-click the folder → “Properties”
- macOS: right-click the folder → “Get Info”
-
Linux: open Terminal in that folder and run
du -sh .
Option 2: find the folder manually
Step 1: open the “profiles” folder
Here's where you can find the “profiles” folder in your file system:
-
Windows:
C:\Users\%username%\mlx\profiles -
macOS:
/Users/%username%/mlx/profiles -
Linux:
/home/%username%/mlx/profiles
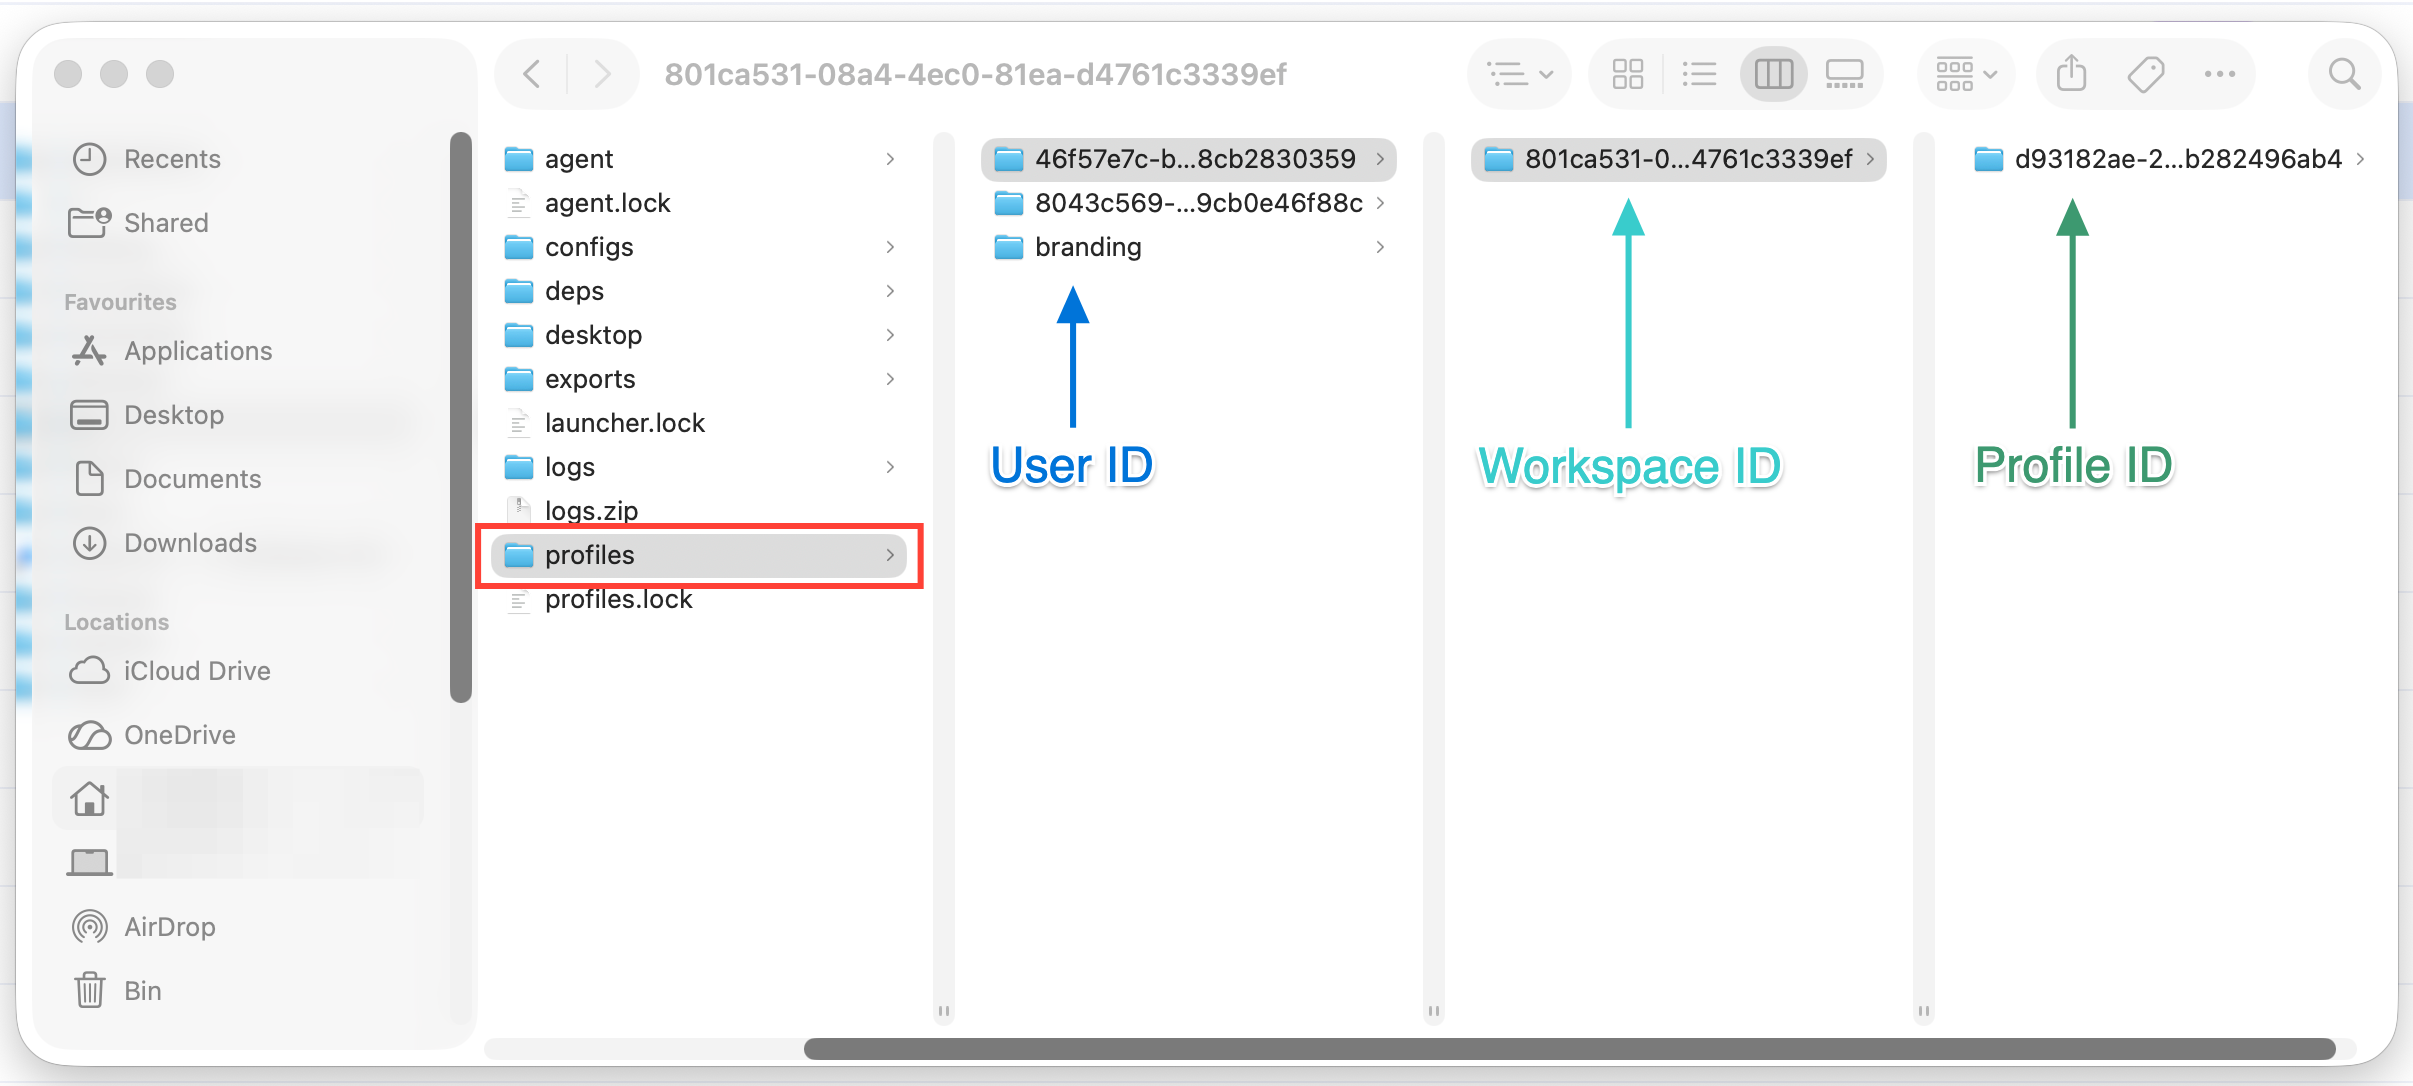
The “profiles” folder has its hierarchy:
- Inside the “profiles” folder, you’ll see folders named with your User ID
- Inside the User ID folder, you’ll see folders named with your Workspace ID
- Inside the Workspace ID folder, you’ll see folders named with your Profile ID
Below we'll explain how to find the User, Workspace, and Profile ID.
Step 2: find your user ID
Once you find your User ID, enter the corresponding folder.
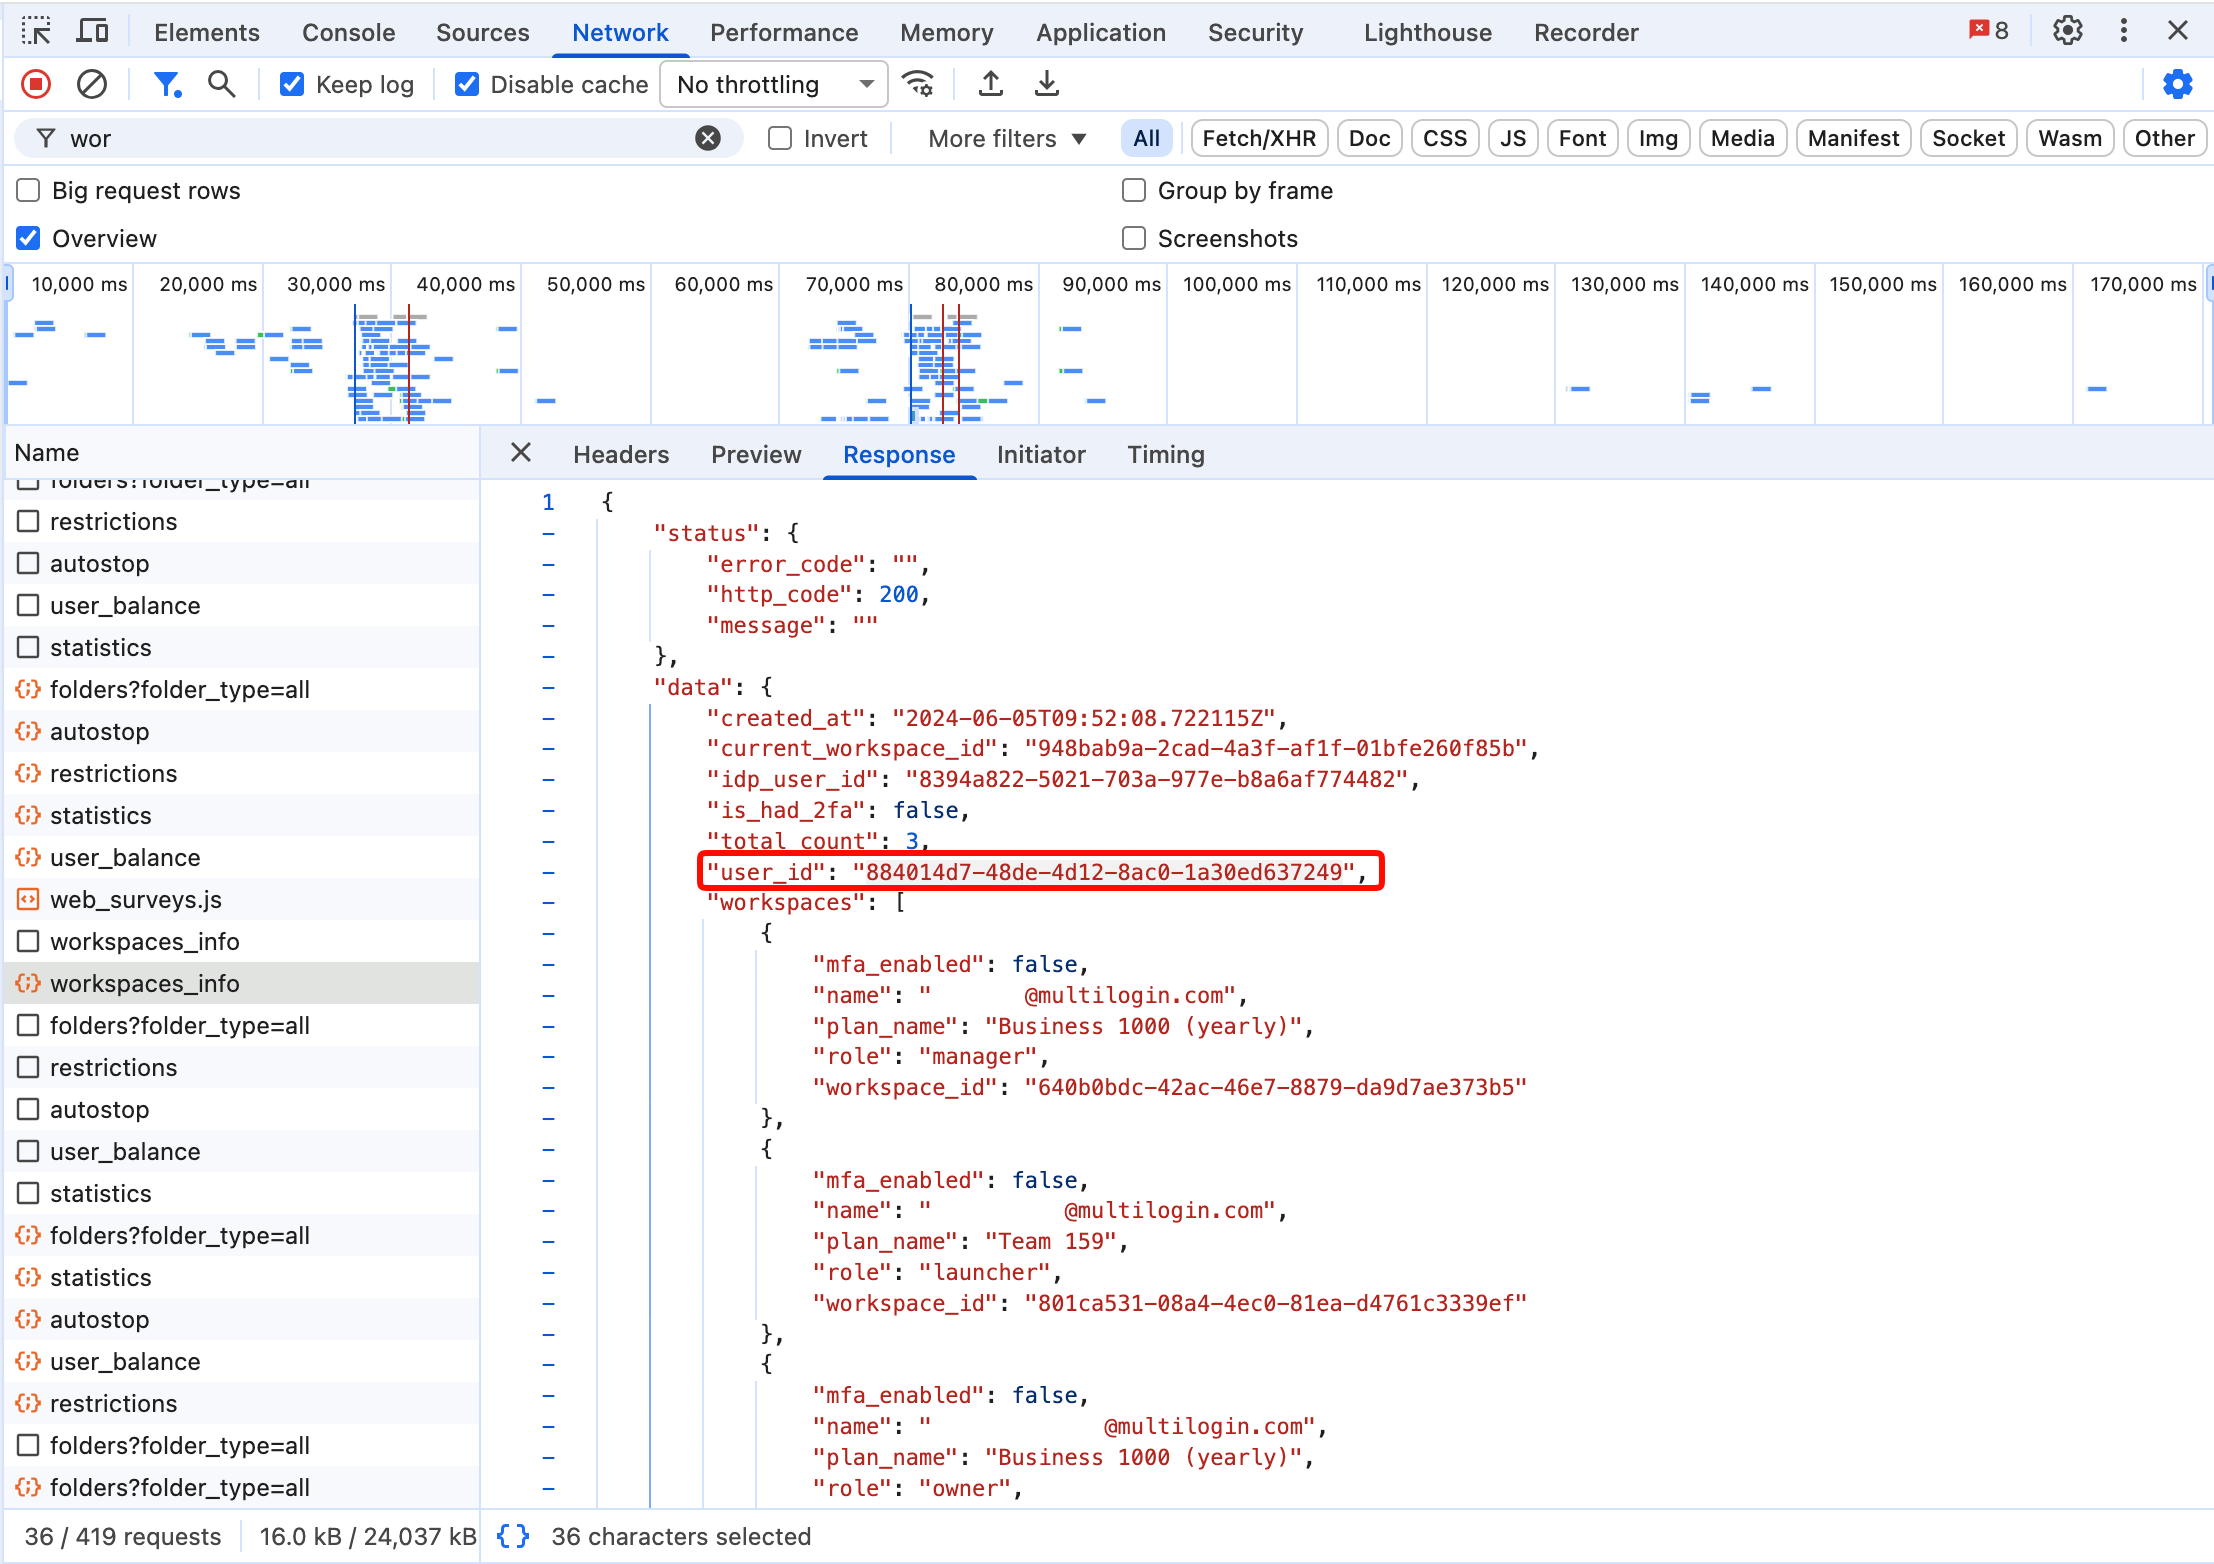
Use DevTools to find a Multilogin user ID when a support or technical workflow specifically asks for it.
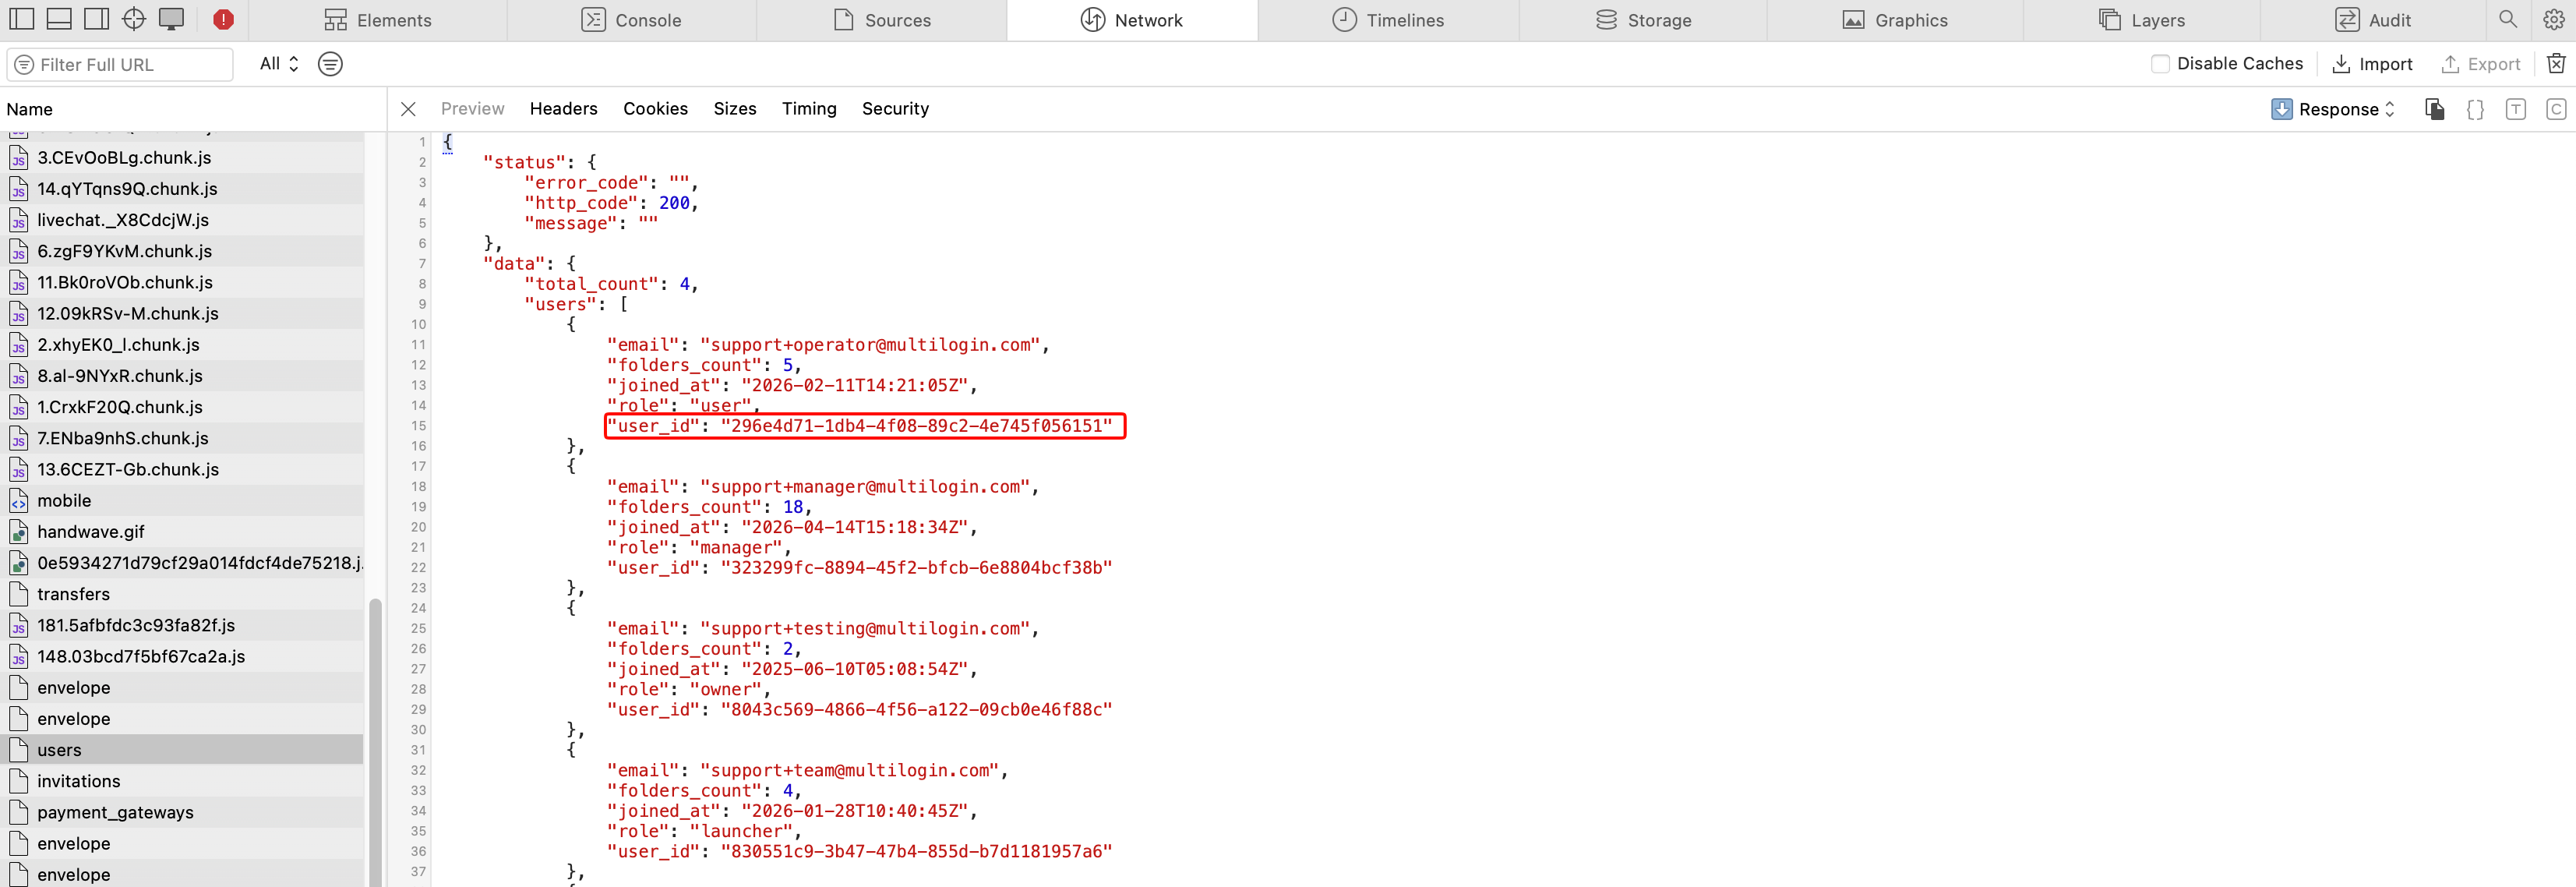
➡️ Open Multilogin → open DevTools → go to “Network” → open “Team” → search for the users request → open the response and copy the required user ID.
Use this only when you need a user-level identifier. For profile or workspace IDs, use the dedicated copy options in Multilogin instead.
A user ID identifies a Multilogin user in the team/workspace data returned by Multilogin.
Desktop app
- Go to the “Profiles” page in Multilogin.
- Open DevTools. Here's how to do that:
-
Windows and Linux: press
Ctrl + Shift + F12 -
macOS: press
Cmd + Shift + Fn + F12
-
Windows and Linux: press
- Switch to the “Network” tab in the DevTools panel
- Select “Team” from the top menu of Multilogin
- In the logs appearing in DevTools, search for users and click on it
- Switch to the “Preview” tab in the newly opened panel, where you will find the user ID
Web interface
- Go to the “Profiles” page in Multilogin.
- Open DevTools. Here's how to do that for Chromium and Firefox-based browsers:
-
Windows and Linux: press
Ctrl + Shift + I -
macOS: press
Cmd + Option + I
-
Windows and Linux: press
- Switch to the “Network” tab in the DevTools panel and refresh the page
- Select “Team” from the top menu of Multilogin
- In the logs appearing in DevTools, search for workspaces_info and click on it
- Switch to the “Response” tab in the newly opened panel, where you will find the user ID
Step 3: find your workspace ID
Once you find your Workspace ID, enter the corresponding folder.
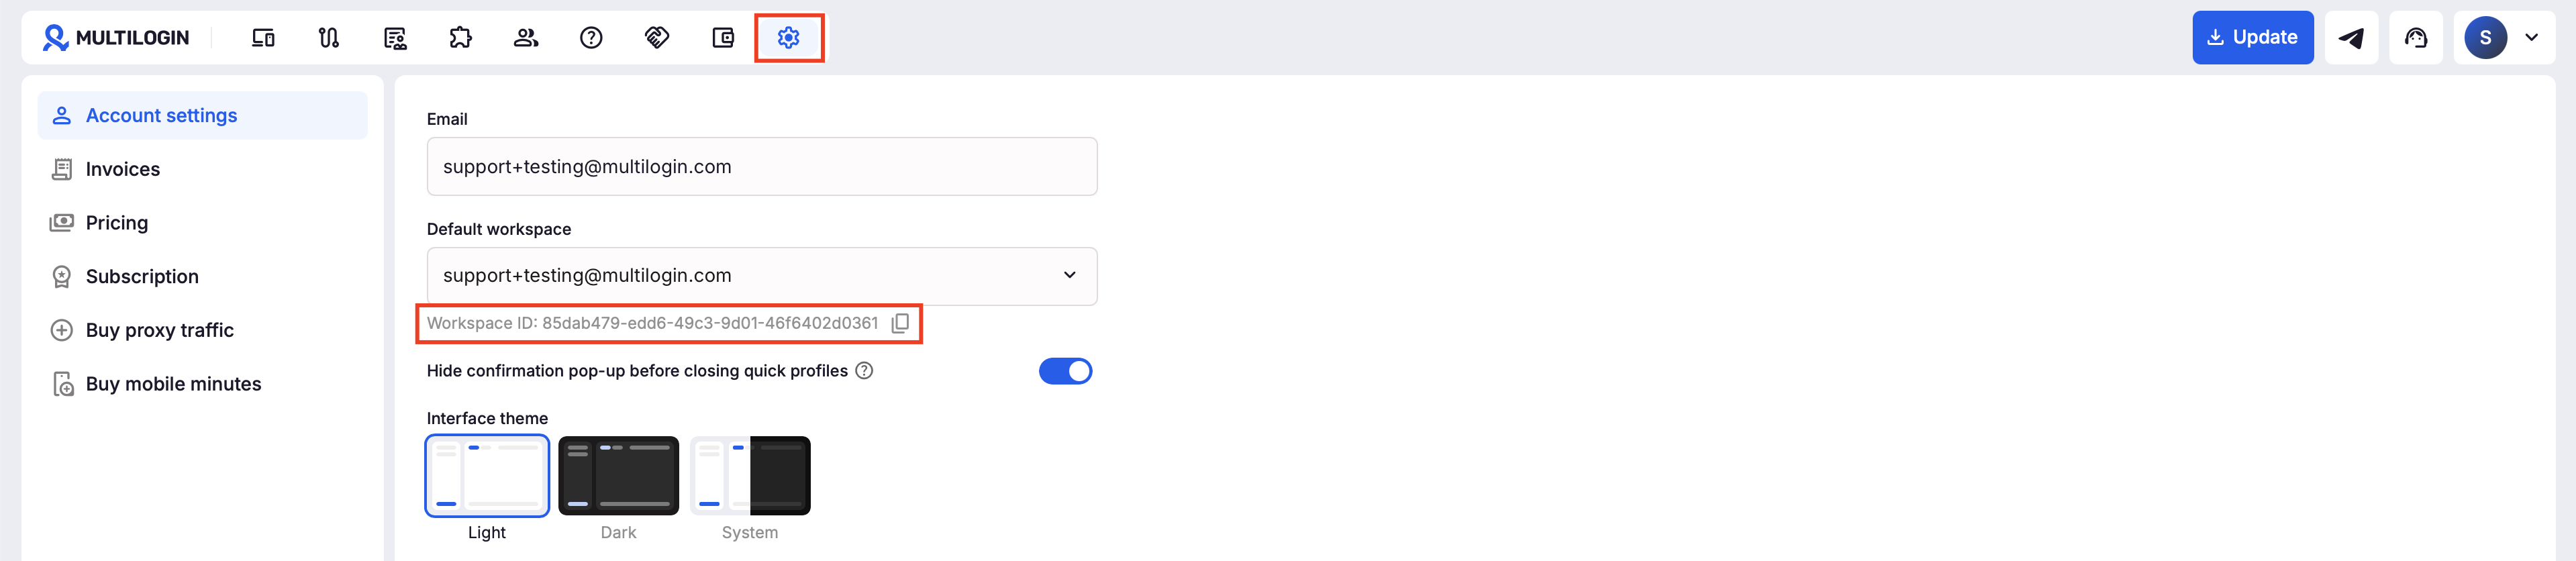
- Go to “Account settings” in the top navigation bar in Multilogin
- Find the “Default workspace” selector and copy your Workspace ID
Step 4: find your profile ID
- Go to the “Profiles” page in Multilogin
- Right-click the profile you need and click “Copy profile ID”
Step 5: check the profile folder size
Once you find the correct profile folder, check its size:
- Windows: right-click the folder → “Properties”
- macOS: right-click the folder → “Get Info”
-
Linux: open Terminal in that folder and run
du -sh .


